Tutorial for Purchasing UHost From UCloud Global
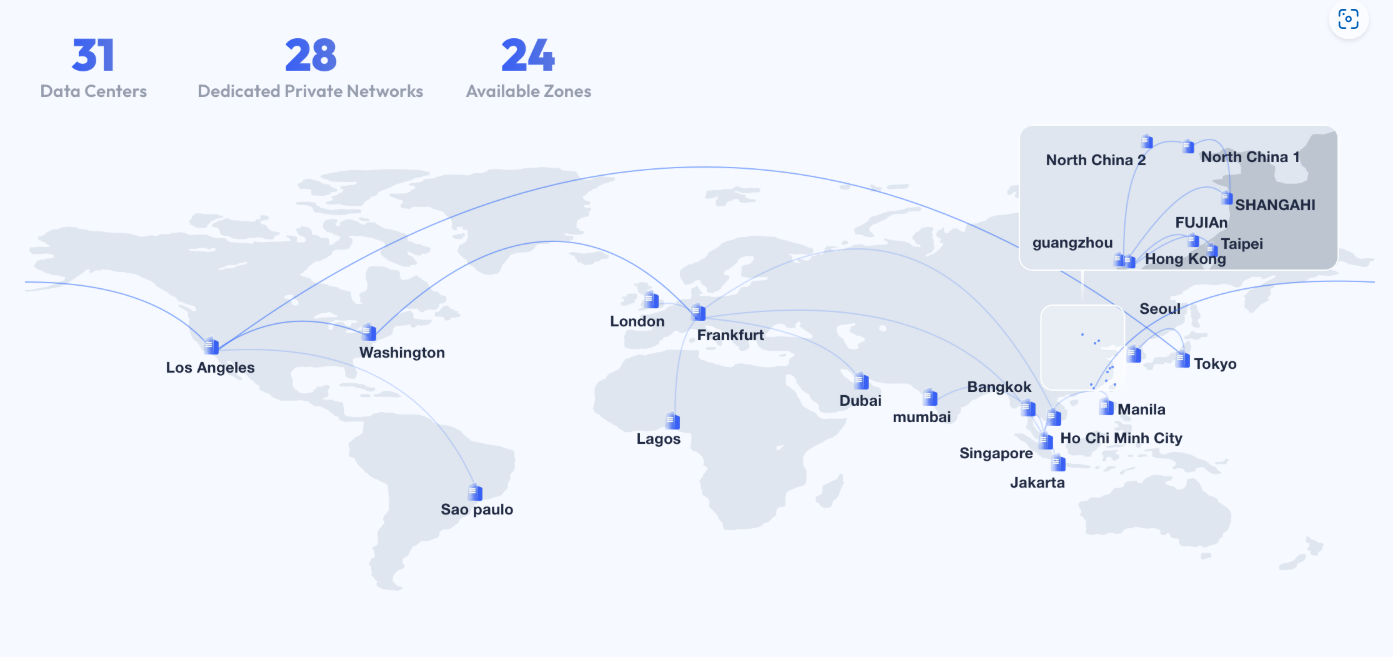
This article introduces the advantages of UCloud Global Virtual Private Server and demonstrates how to create a virtual Private server (UHost) on UCloud Global.
High Performance:UHost provides powerful computing capabilities and supports a variety of virtual machine instance specifications. Clients can flexibly choose CPU, memory, and storage configurations according to your needs to meet the performance requirements of different scenarios.
Global Coverage:UCloud Global offers cloud hosting services in multiple regions and availability zones. Clients can choose deployment locations based on geographic requirements, reducing latency and enhancing user experience.
Technical Support:UCloud Global provides 24/7 technical support to help clients resolve various issues during the use of cloud hosting, ensuring efficient business operations.
Flexible Pricing:UCloud Global offers flexible billing options, including hourly, monthly, or annual billing. Clients can choose the most suitable billing model based on your needs to optimize costs.
We offer two options to make a VM access the Internet. Option1 is more flexible and easy to operate. Option2 (using Nat) is more cost-effective.
Option 1: Purchase a public IP address to each server to access the internet.
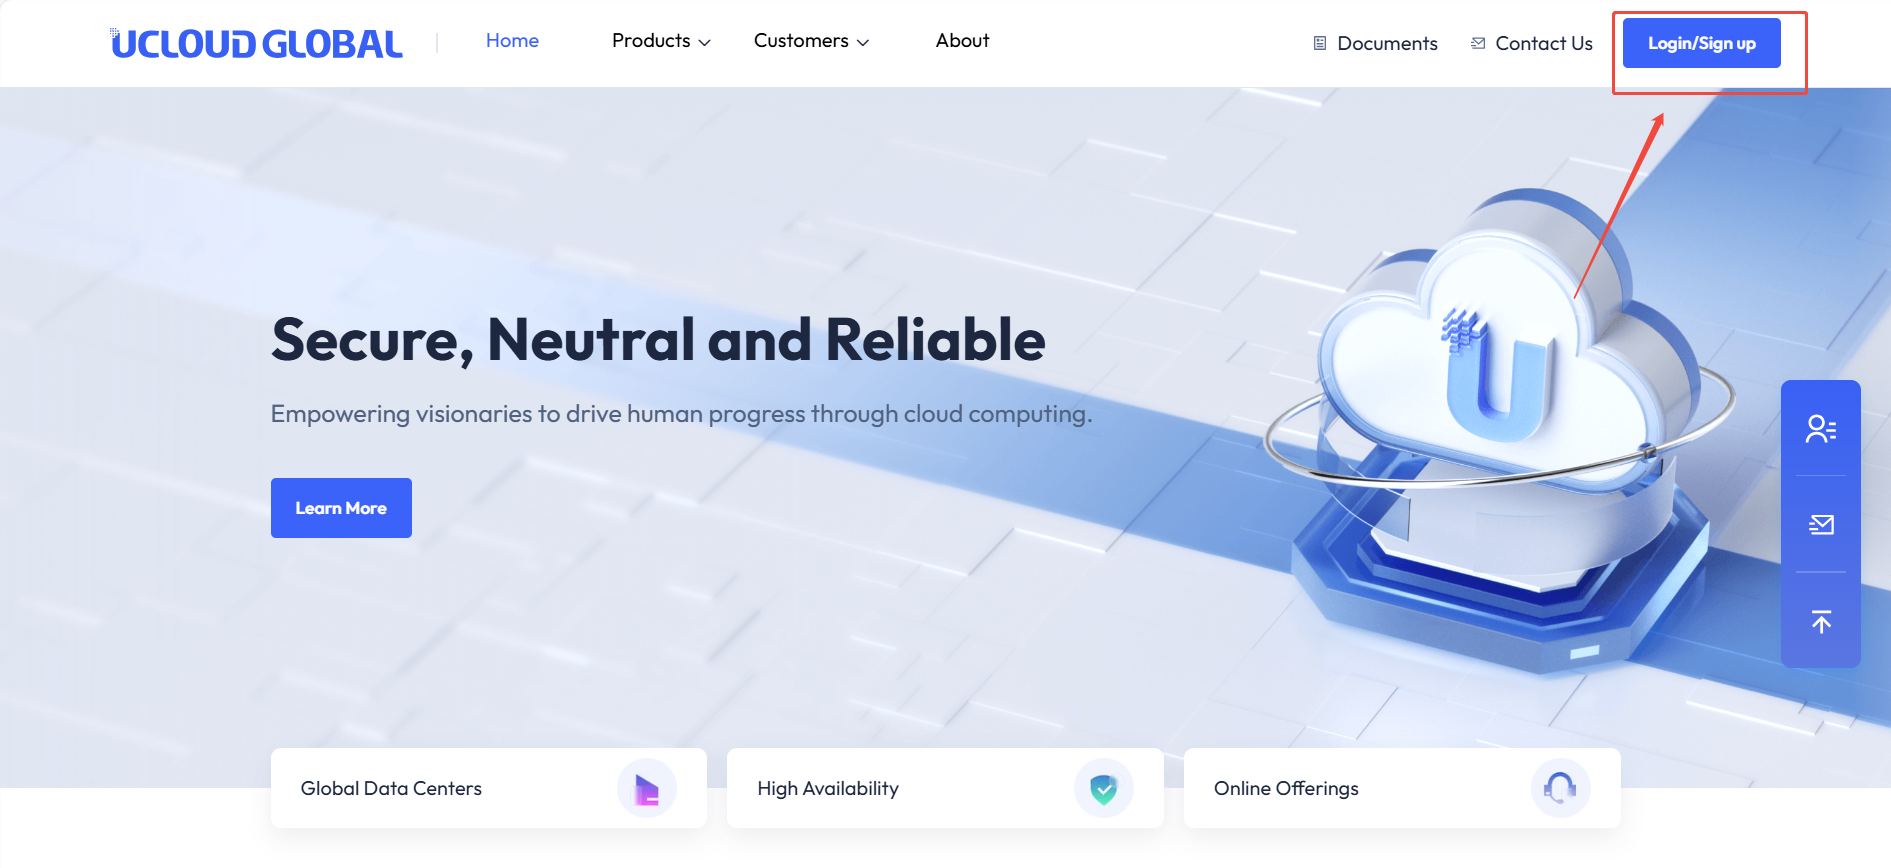
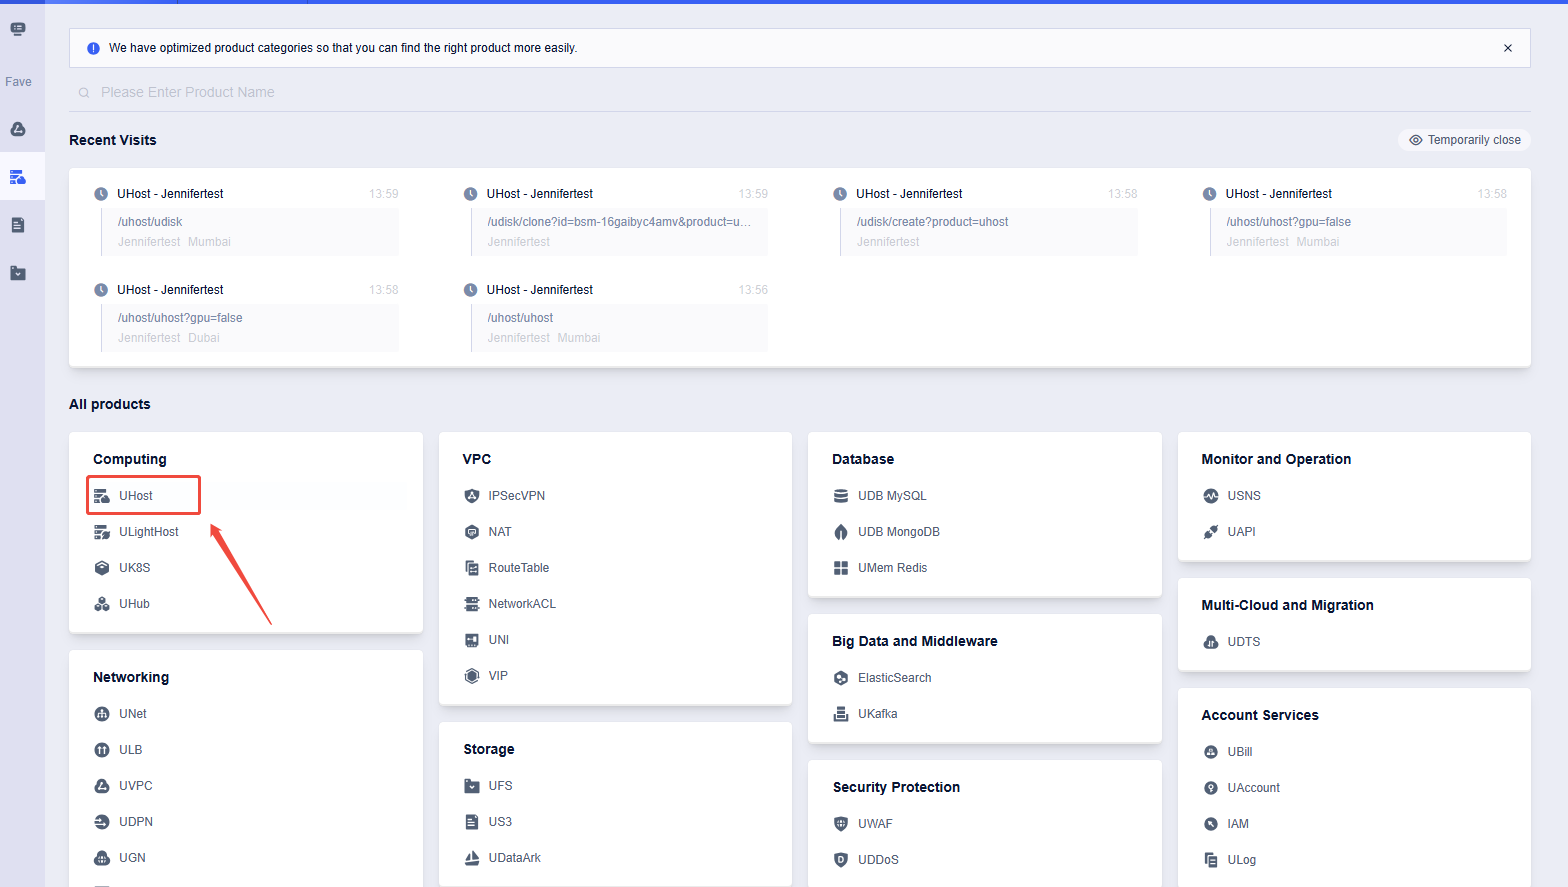
After logging into your account, Click on "UHost"

Click on "Create UHost"
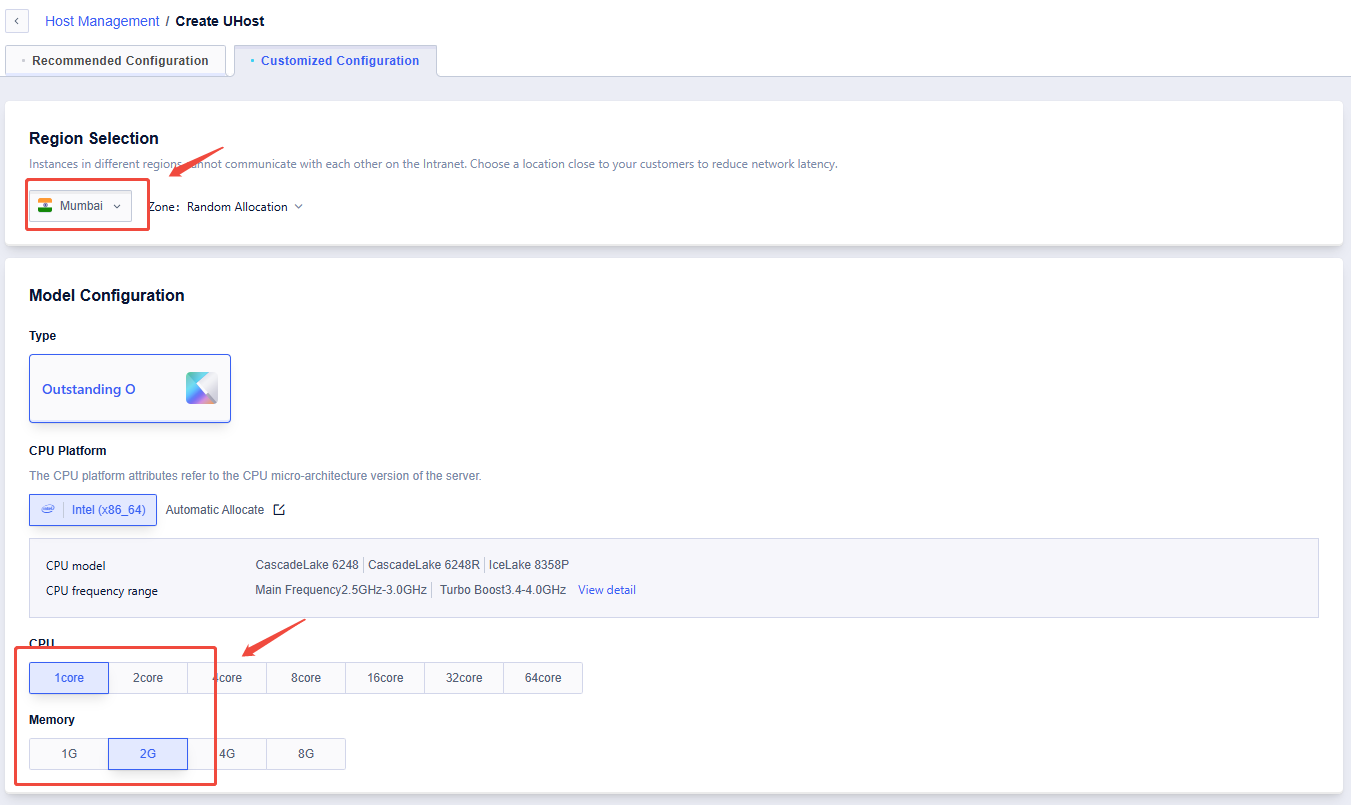
Select the region and other UHost configurations
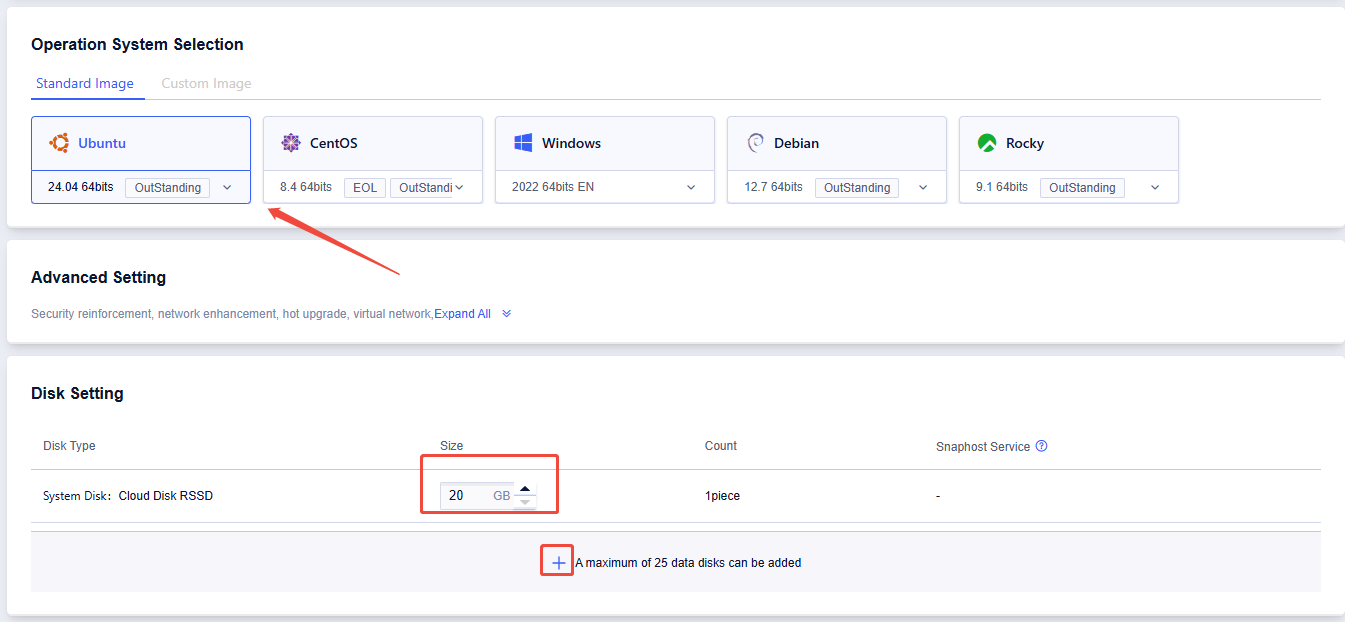
Select the operating system and system disk size, and add data disks if you need

Select the default VPC or click on "Create a VPC".
If you click "Create a VPC":

Click "Create VPC"
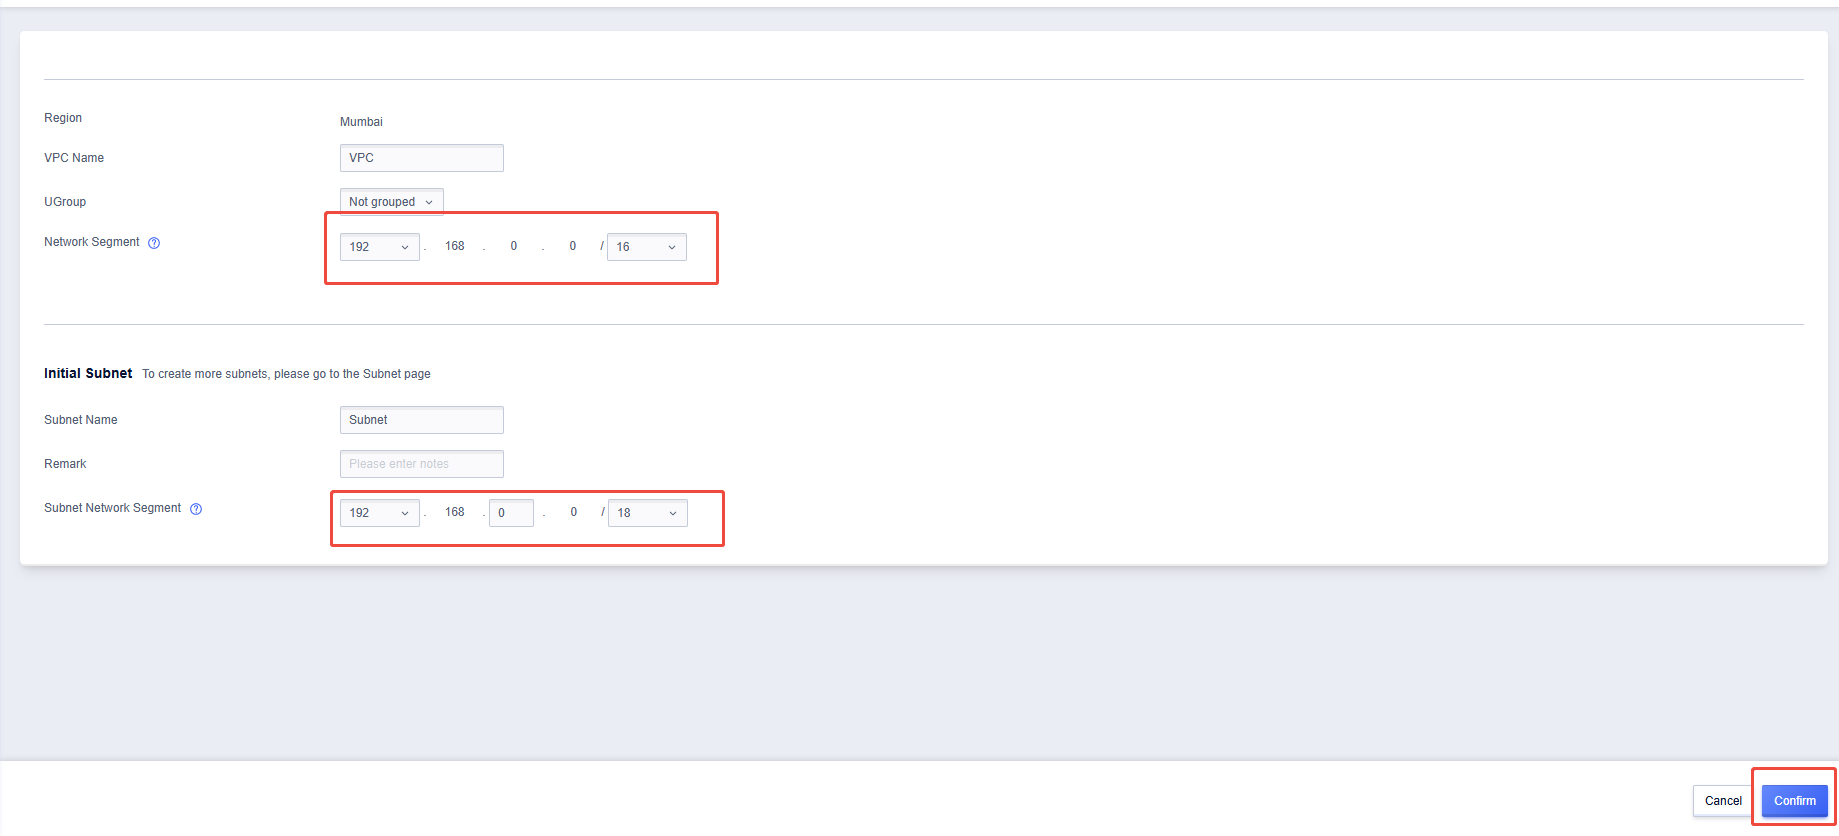
Set the subnet according to your requirements (other options can be filled in as needed), then click "Confirm".

Return to the create UHost page to select the new VPC.

Purchase a public IP address and select the bandwidth.

Select the default firewall or click "Add Firewall".
If you click "Add Firewall":

Click "Create Firewall"
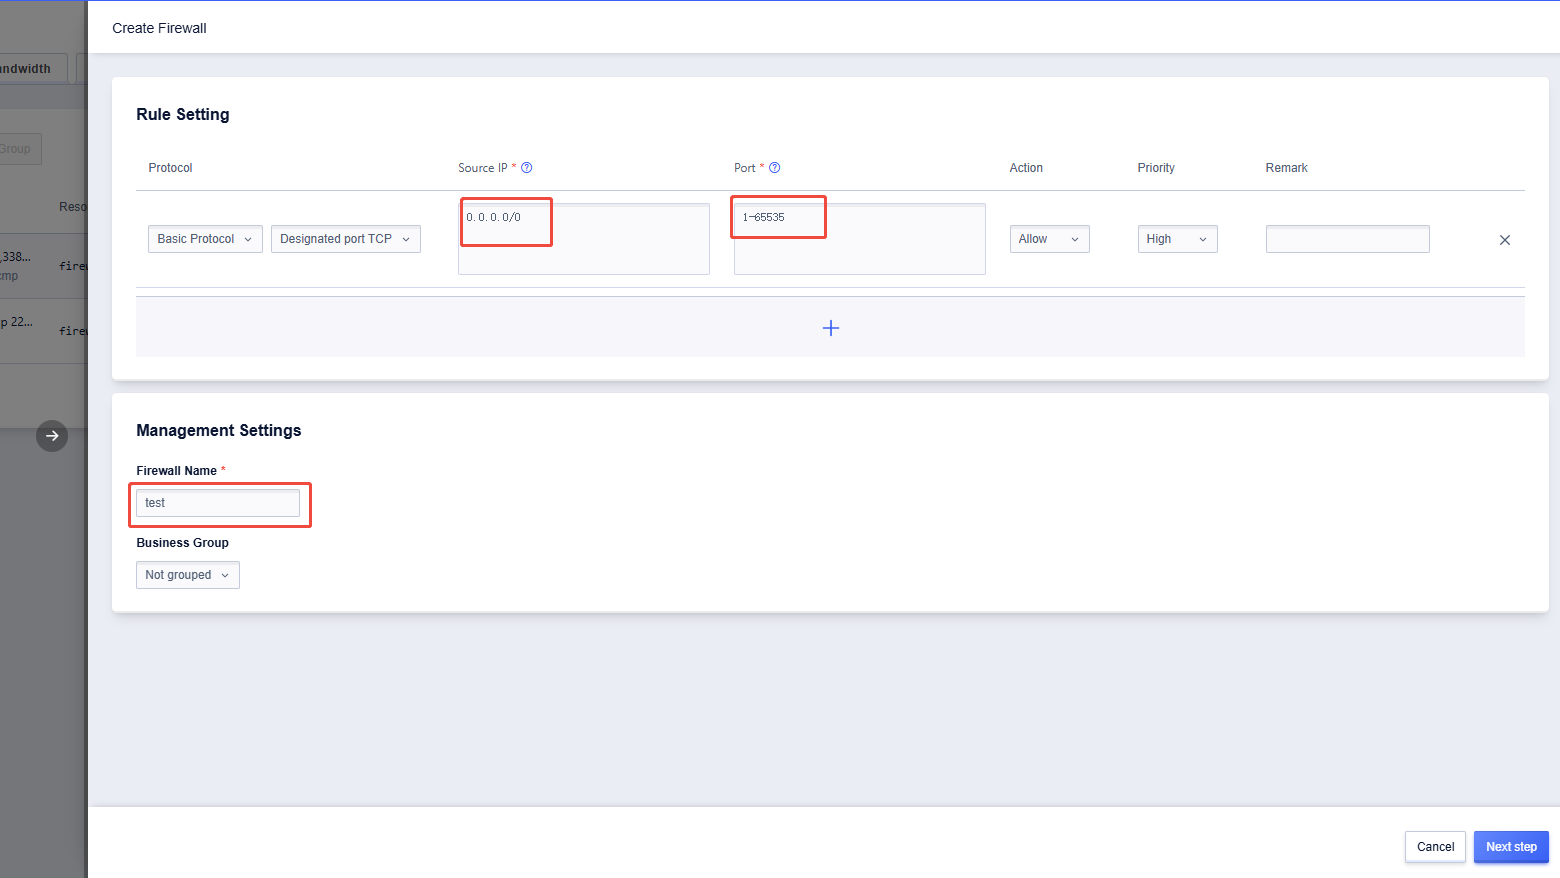
Allow IPs and ports according to your requirements, enter the "Firewall Name" (other options can be filled in as needed), and then click "Next step".
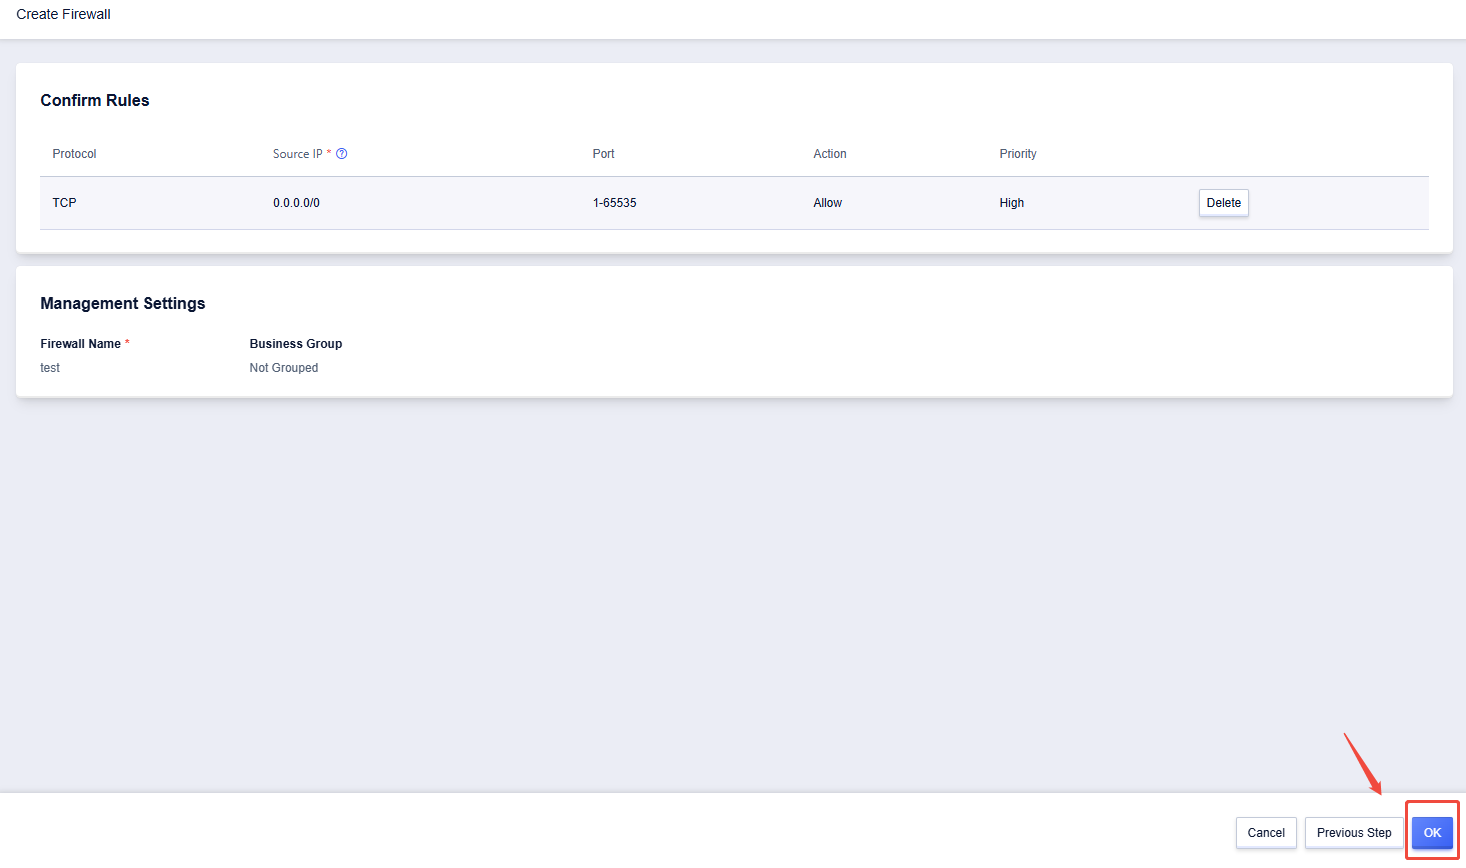
If the displayed content is correct, click "OK".
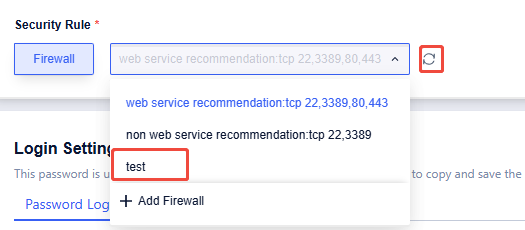
Return to the create UHost page to select the new firewall.
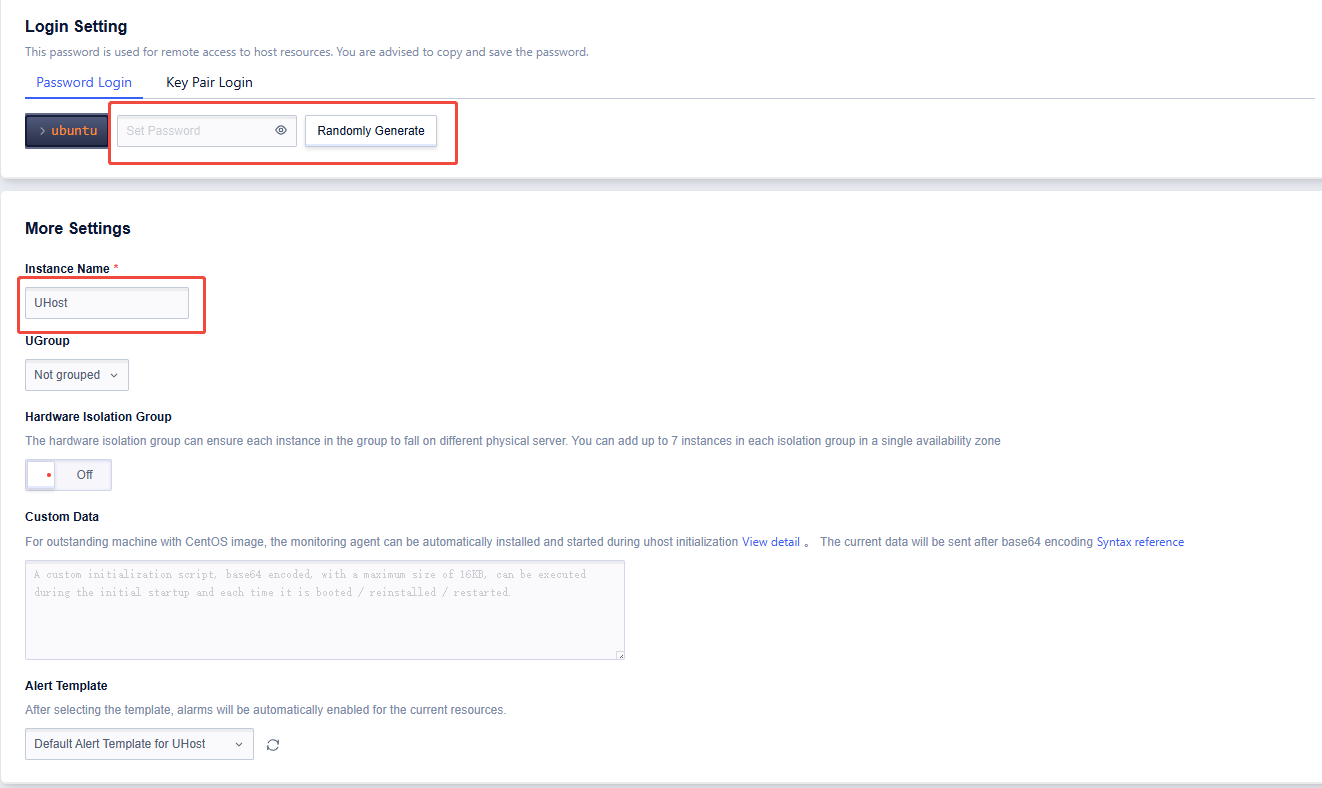
Set the password and enter the "Instance Name" (other options can be filled in as needed).
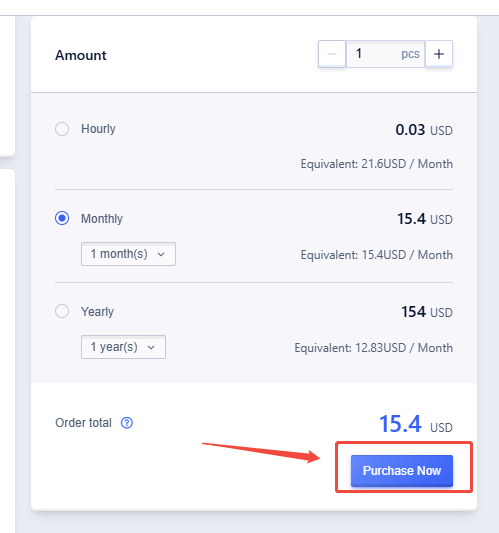
Select the payment method (Hourly, Monthly, or Yearly), and click "Purchase Now"

Click "Submit my order"

The UHost you purchased will be displayed in the console. Click "Login" to access it.
Option 2: Use NAT to access the internet, requiring only one public IP address


The process of purchasing the UHost is the same as in Option 1, except that you need to uncheck "Purchase and Bind".

Once you have purchased the required UHosts, they will be displayed in the console. Then, click "All Products".
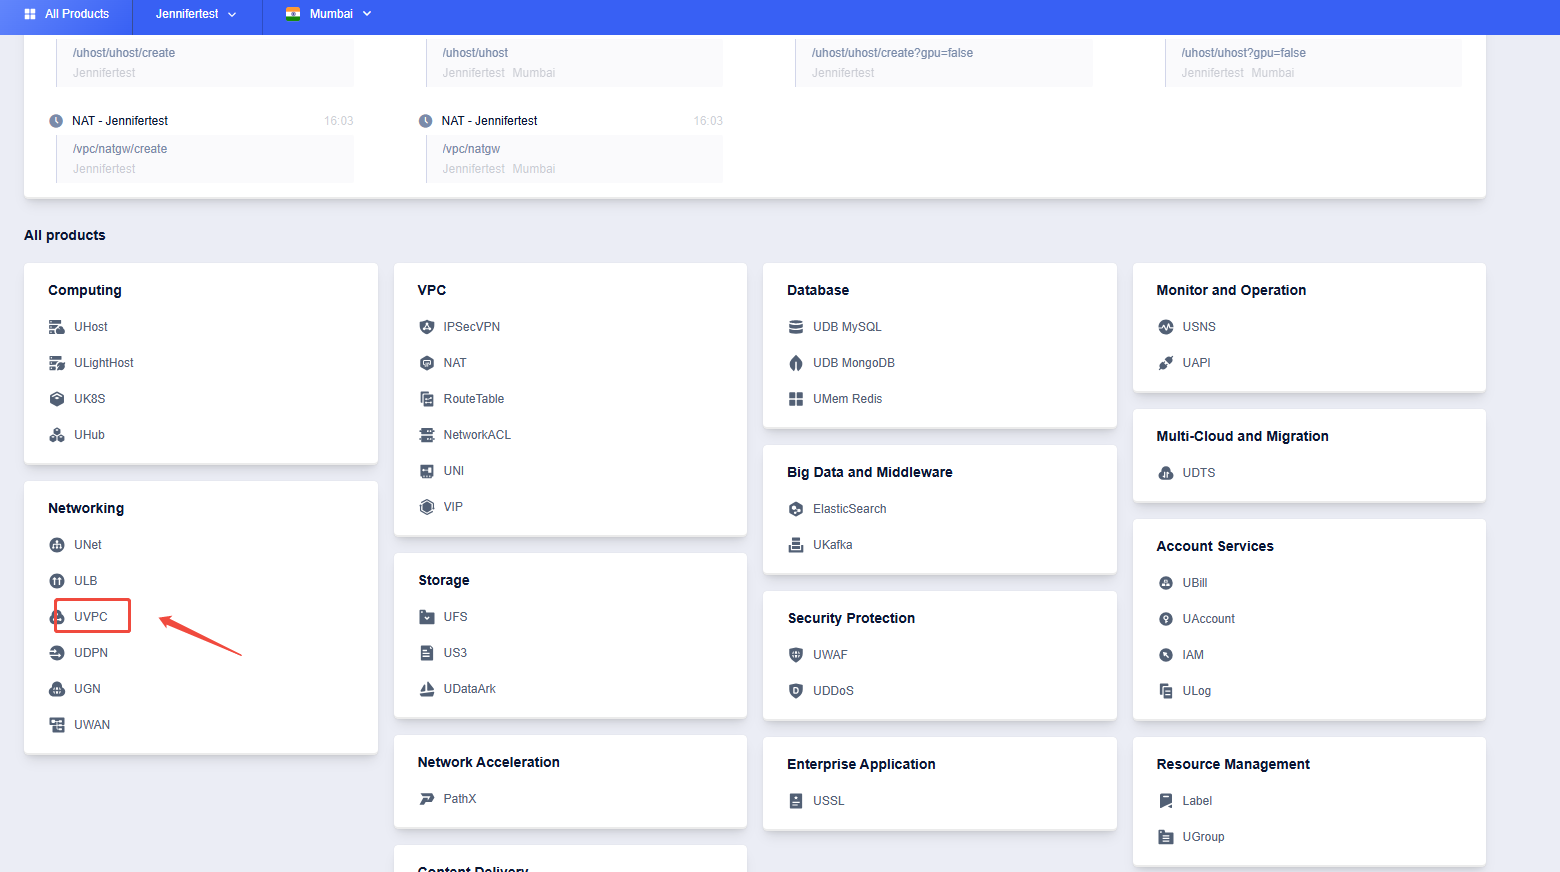
Click "UVPC"

Click "NAT Gateway," then click "Create NAT Gateway"
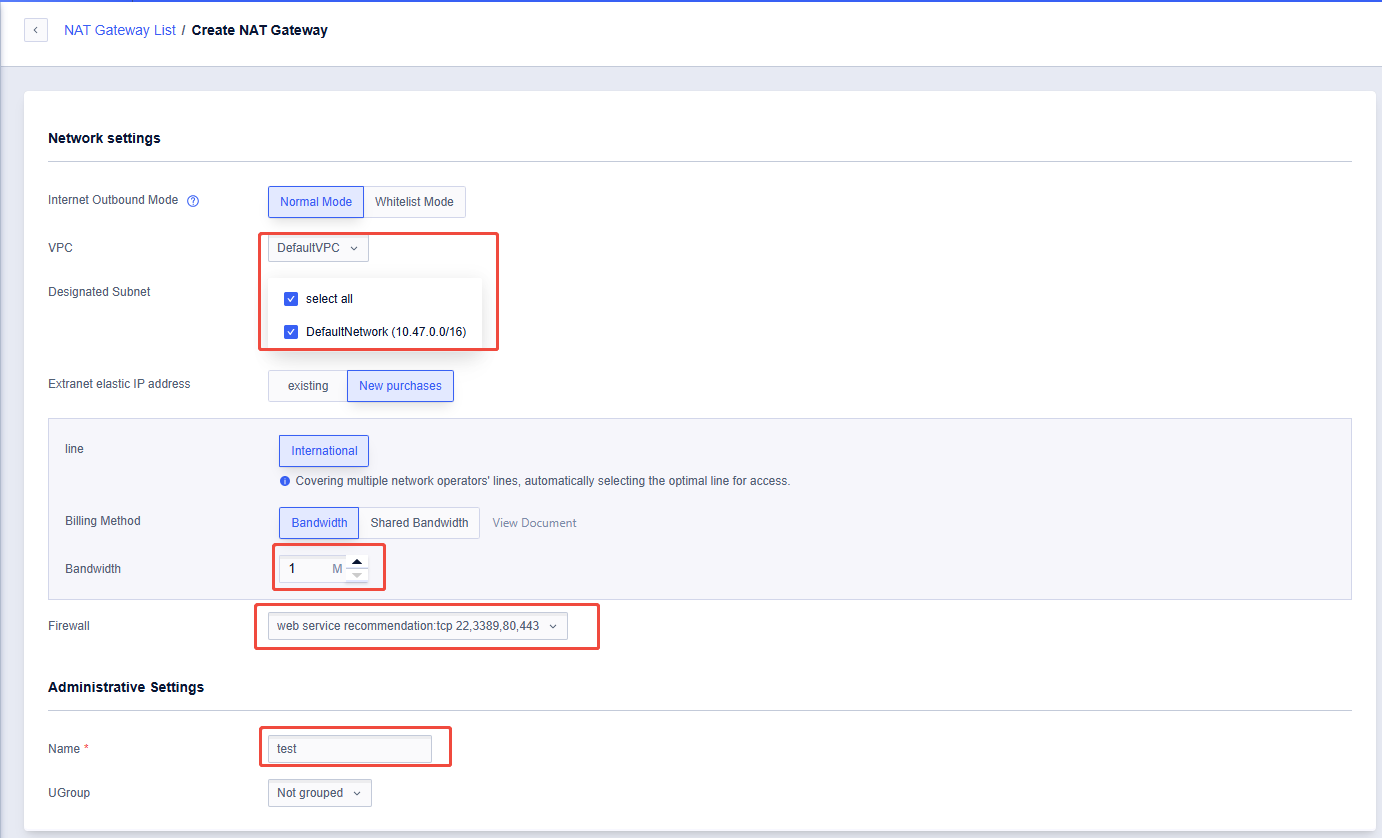
Select the VPC where the NAT gateway will be applied, the bandwidth for the public IP, and the firewall. Then, enter the NAT gateway name (other options can be filled in as needed).
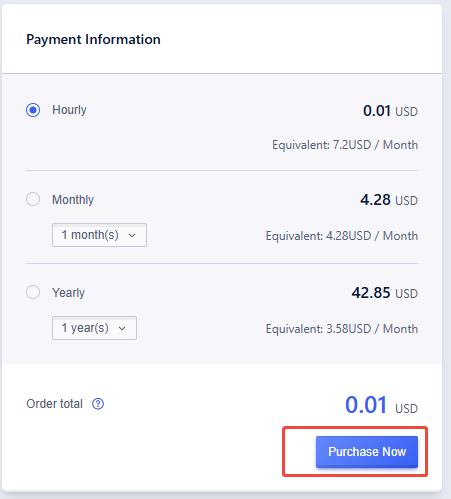
Select the payment method (Hourly, Monthly, or Yearly), and click "Purchase Now"

The configured NAT service will be displayed in the console. The meaning of the image is that UHosts within the DefaultVPC can access the internet through the public IP: 152.32.156.54. Conversely, through the public IP: 152.32.156.54, clients can access the UHosts within the DefaultVPC.

In addition, you can configure port forwarding by clicking "Port forwarding." This way, when clients access different ports of the NAT public IP address, the traffic can be forwarded to the corresponding ports of different UHosts within the DefaultVPC for services.
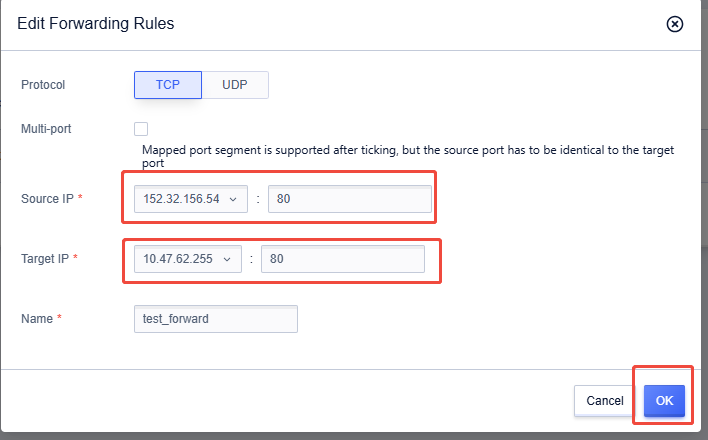
The 'Source IP' is the NAT public IP and port, while the 'Target IP' is the internal IP and port of the UHost where the request will be forwarded. Then, click "OK".

Once the rule is configured, it will be displayed in the console. This diagram shows that when a client accesses port 80 of the public IP 152.32.156.54, the request will be forwarded to port 80 of the UHost with the internal IP 10.47.62.255 for response and service.
Browse At Random.
- 2025-01-15Tutorial for Setting up Firewall rules
- 2025-03-17Tutorials for Use UCloud Data Ark
- 2025-01-20Tutorial for Mysql data recovery
- 2025-01-04Tutorial for Purchasing UHost From UCloud Global
- 2025-01-17Tutorial for UFS


