Tutorial for UDTS(Transfer MYSQL from UCLoud to UCloud Global)
一、Configurations on the Source Database Side (UCloud)
It is necessary to enable database access over the internet via NAT. The configurations are as follows:
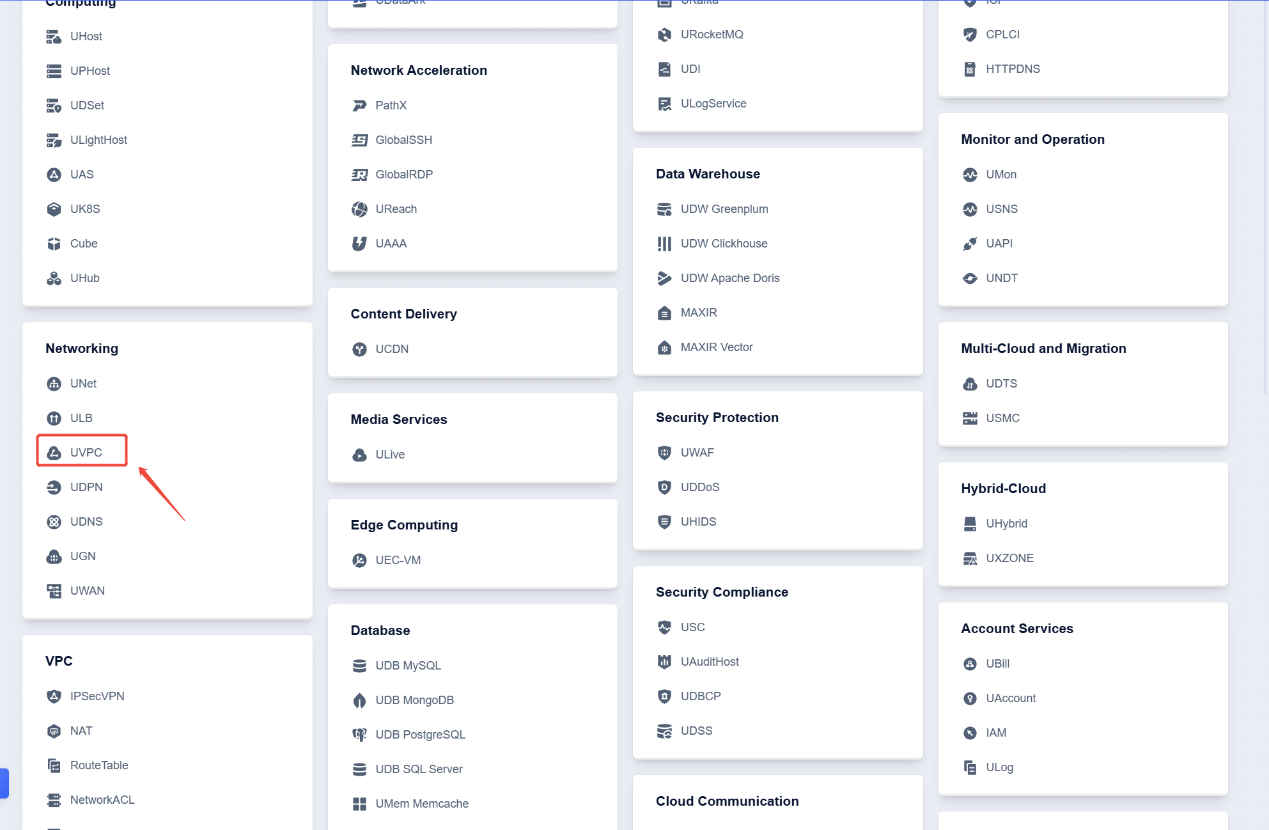
After logging into your account, click on "UVPC"

Click on "Create NAT Gateway"
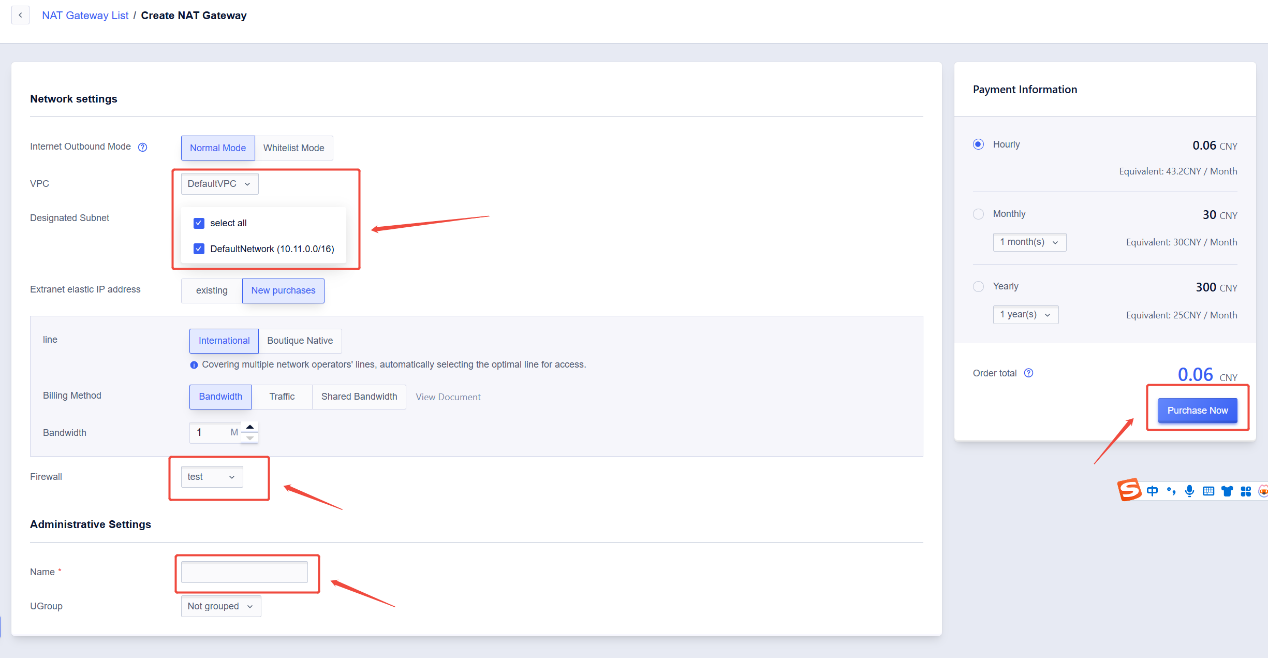
1、 Select the VPC where the MySQL database is located.
2、 Select the firewall (ensure that the MySQL port 3306 is allowed. If needed, you can create a new firewall by clicking "UNet").
3、 Enter the name for the NAT Gateway.
4、 Click on "Purchase Now"

After creating the NAT, click on "Port Forwarding"

Click on "Add Forwarding Rule"
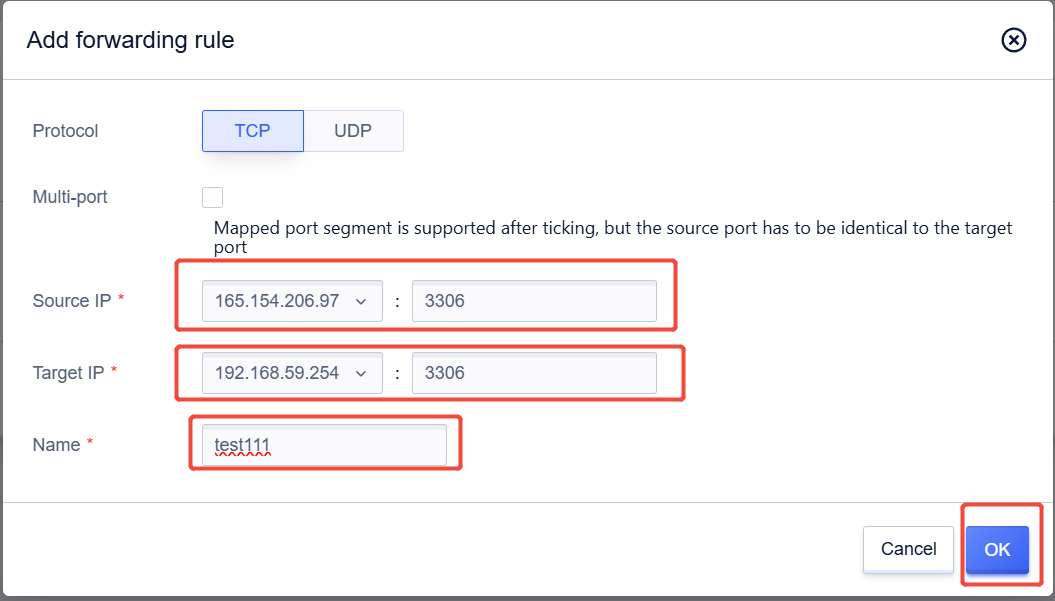
1、 The Source IP is the public IP of the NAT gateway and port 3306.
2、 The Target IP is the internal IP of the MySQL database and port 3306.
3、 Enter the Name.
4、 Click on "OK"

The image above shows that the configuration was successful. You can access the MySQL database (internal IP 192.168.59.254) via port 3306 of the public IP 165.154.206.97.
二、Configurations on the Target Database Side (UCloud Gblobal)
First, we need to create the target database, log into the database to grant permissions, then create a NAT gateway to allow internet access, and finally use UDTS to migrate the database. The configurations are as follows:
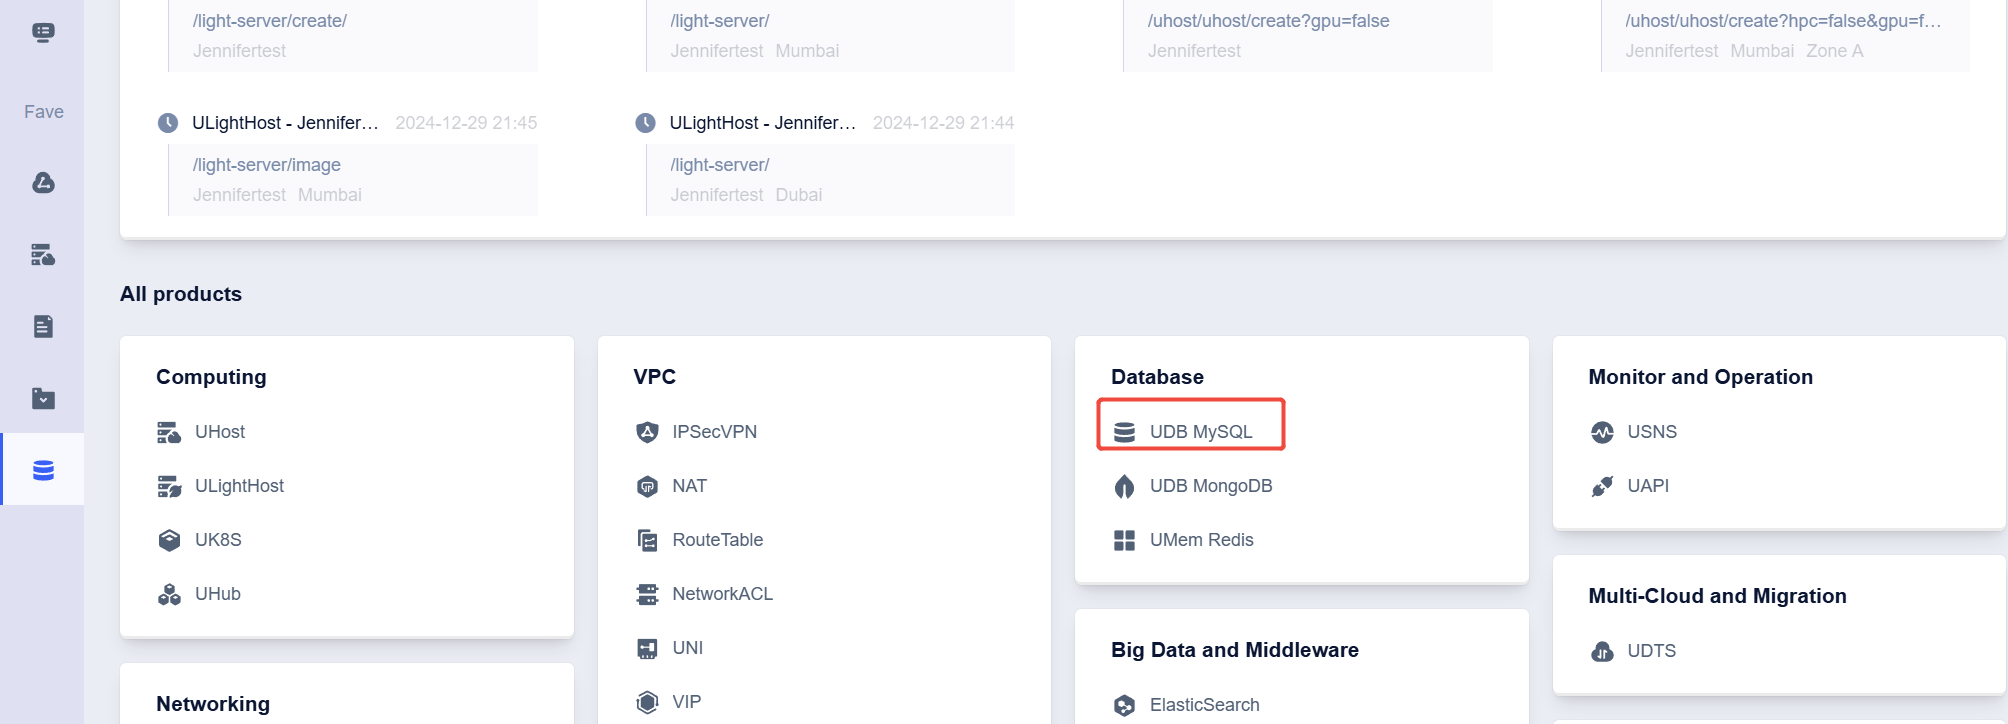
After logging into your account, click on "UDB MYSQL"

Click on "Create Database"
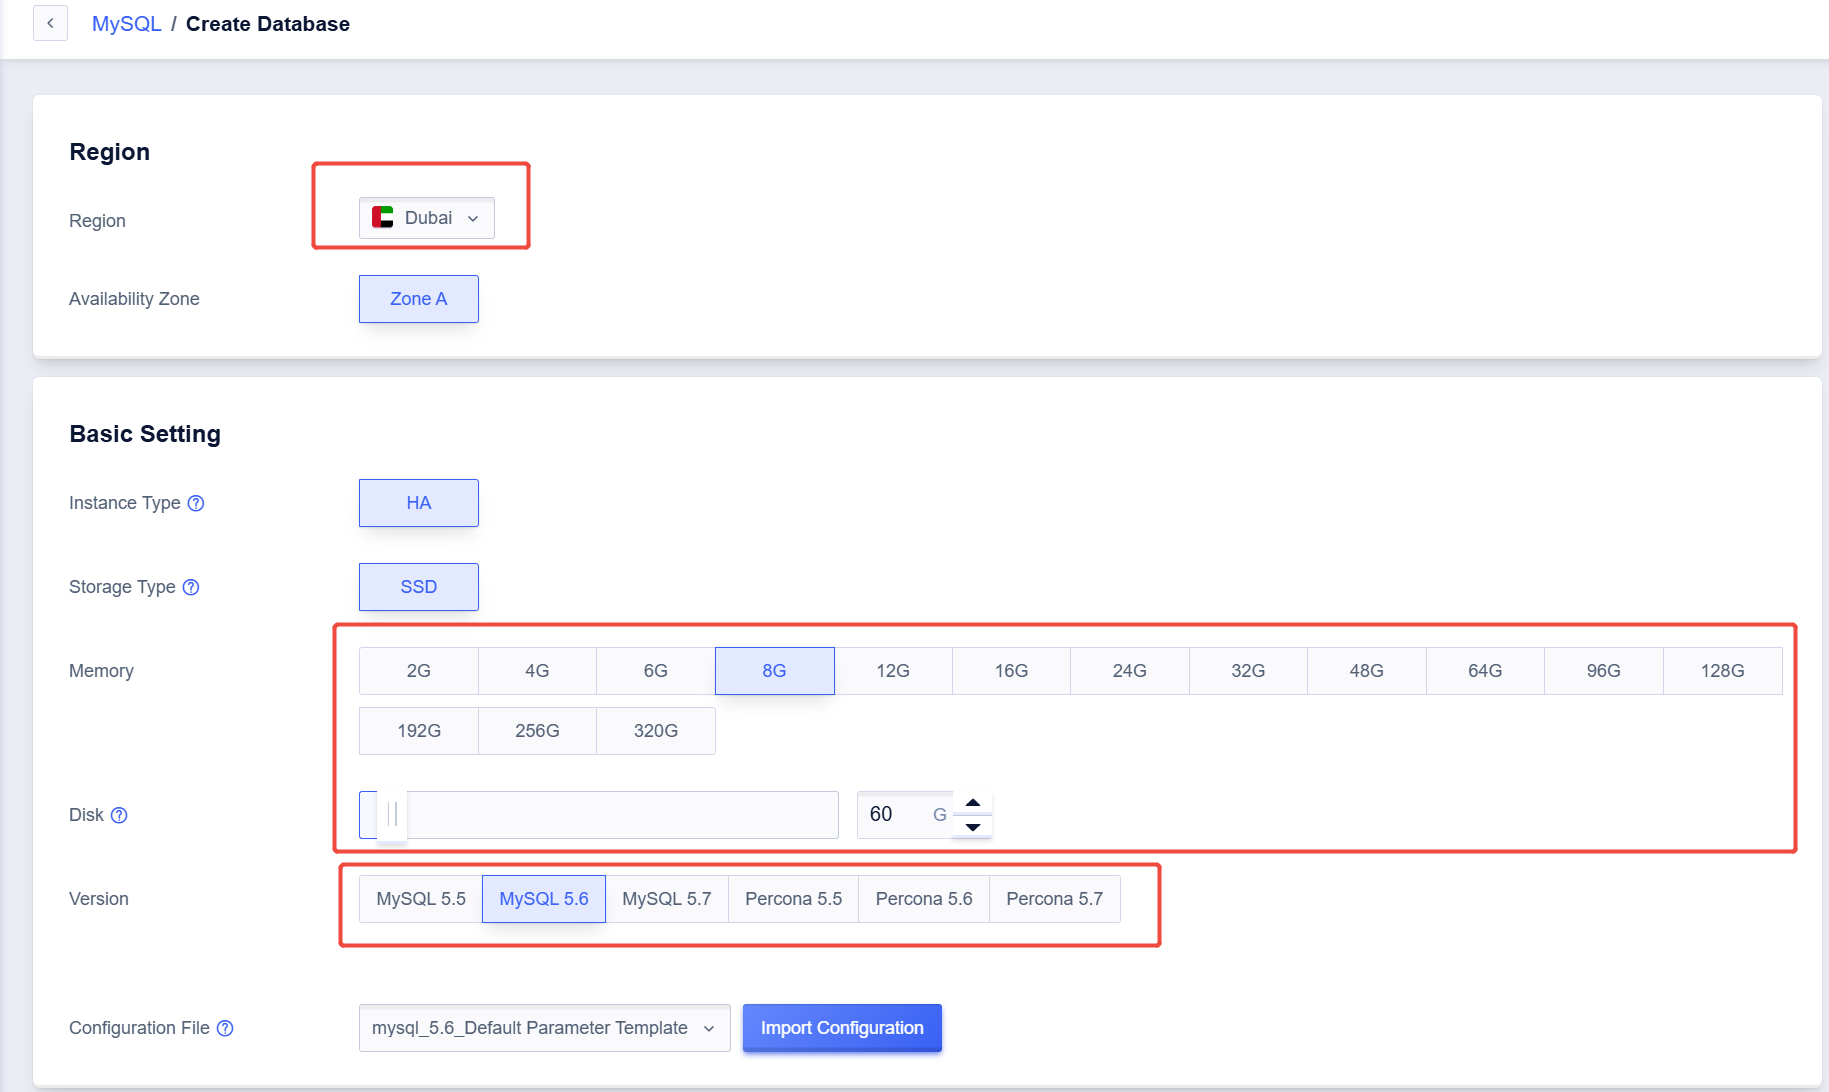
1、 Select the region.
2、 Select the size of Memory
3、 Select the MySQL version (Note: The version of the target database must be equal to or higher than the source database's version to avoid potential compatibility issues).
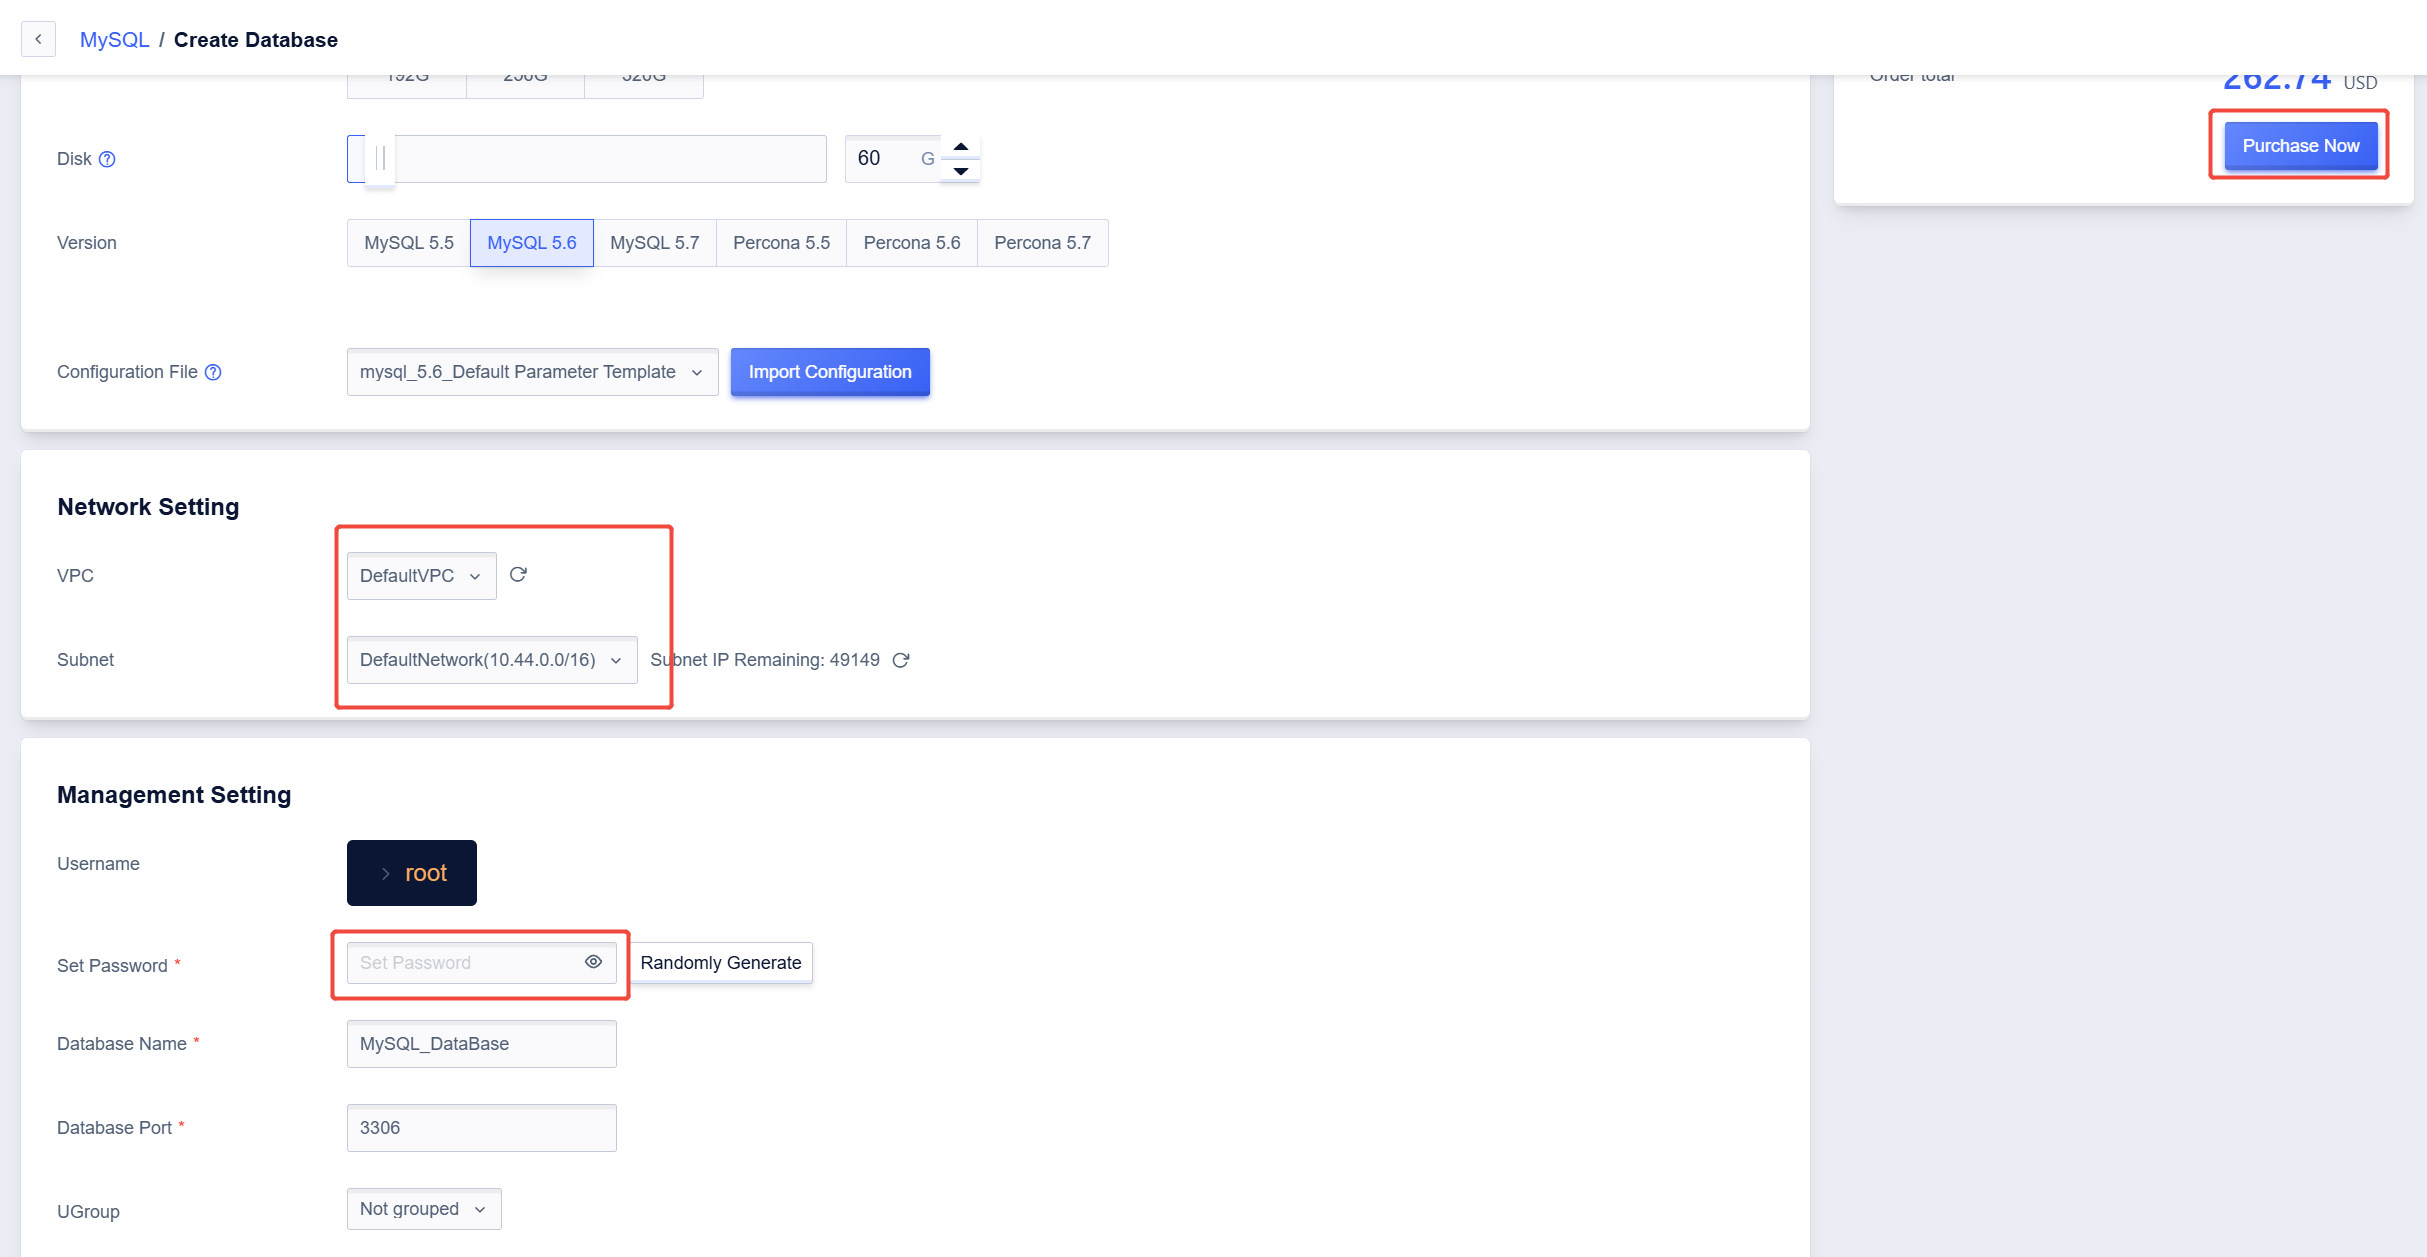
Set the VPC and password for the database, then click on "Purchase Now"
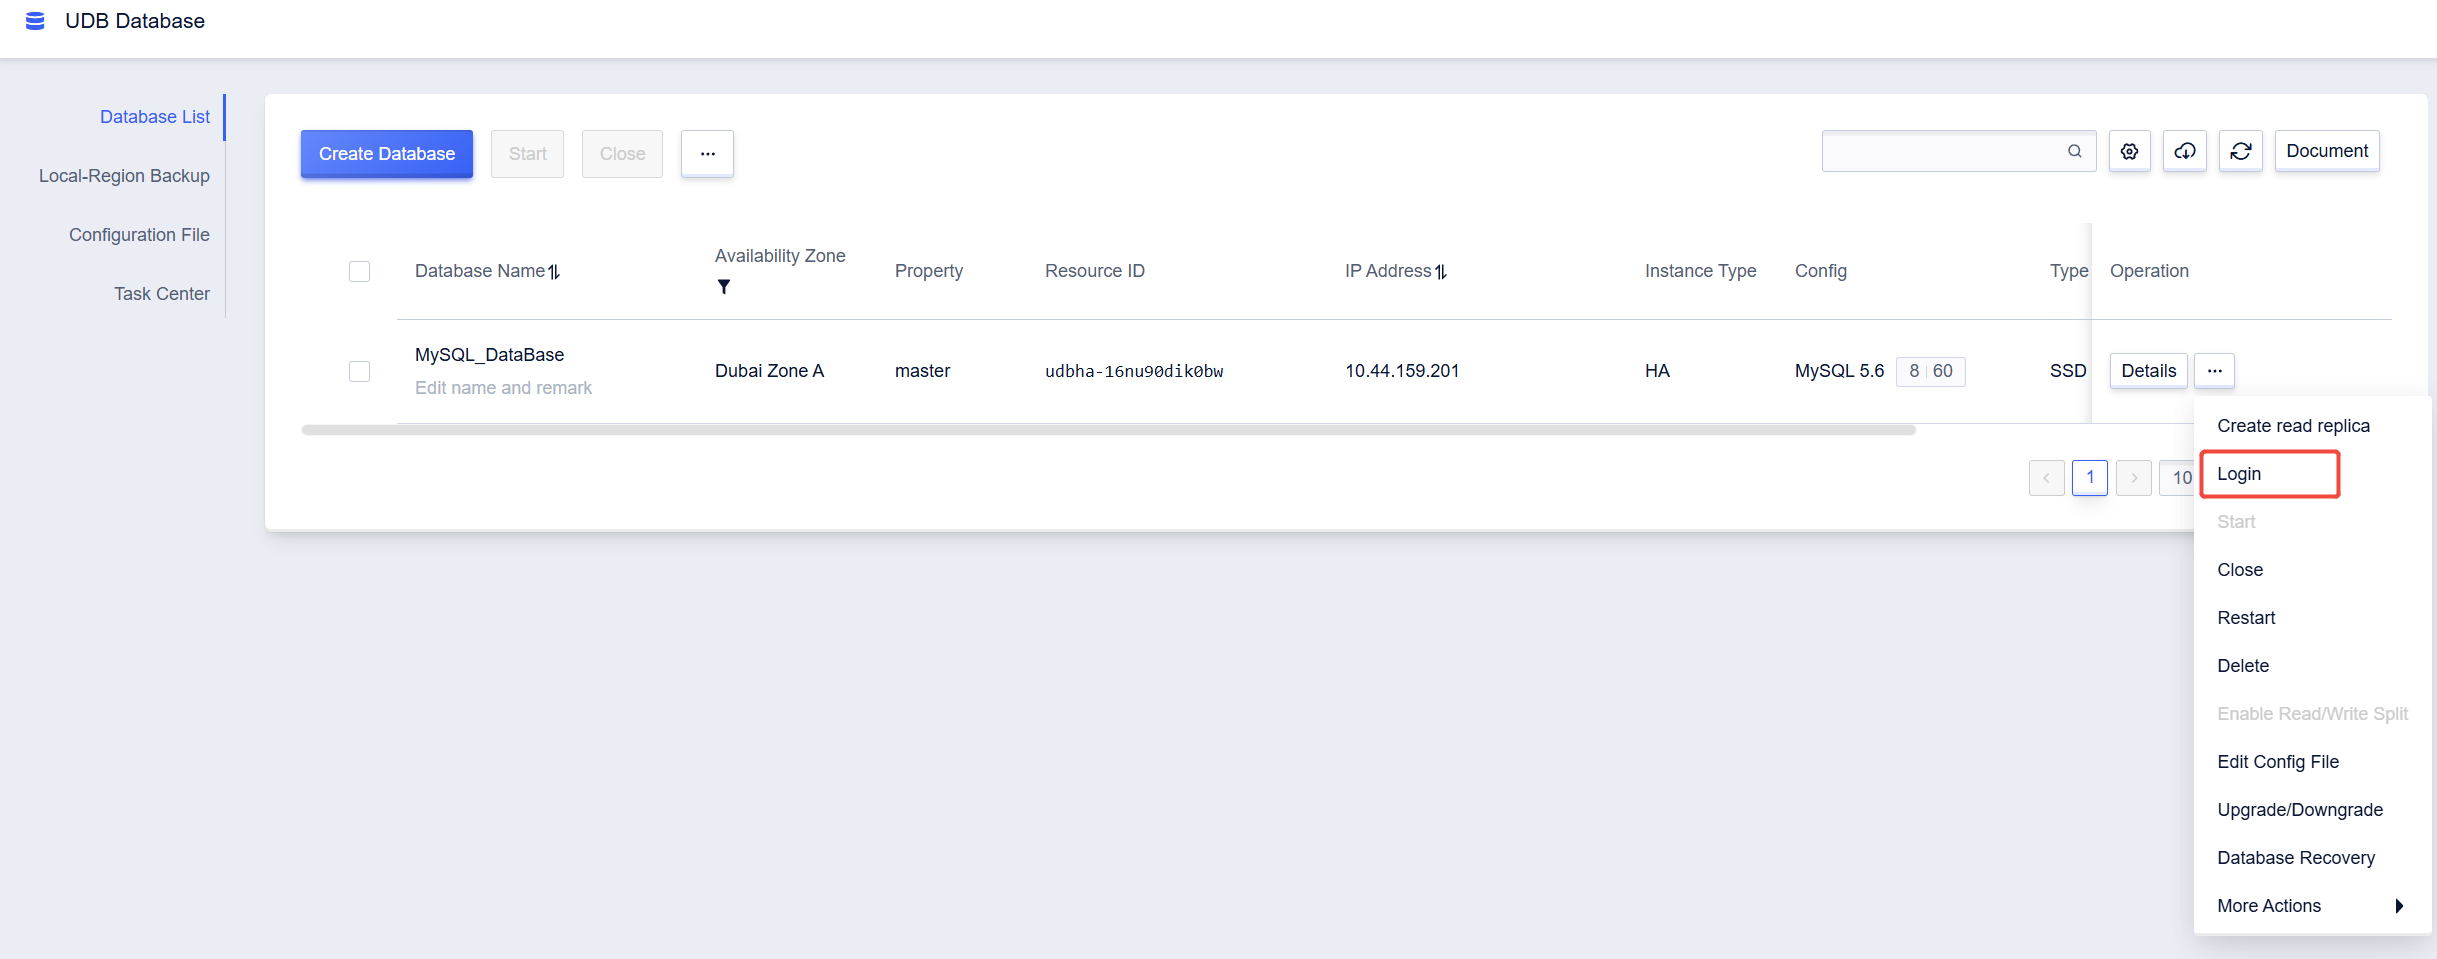
The created database will be displayed in the console. Click on "Login"
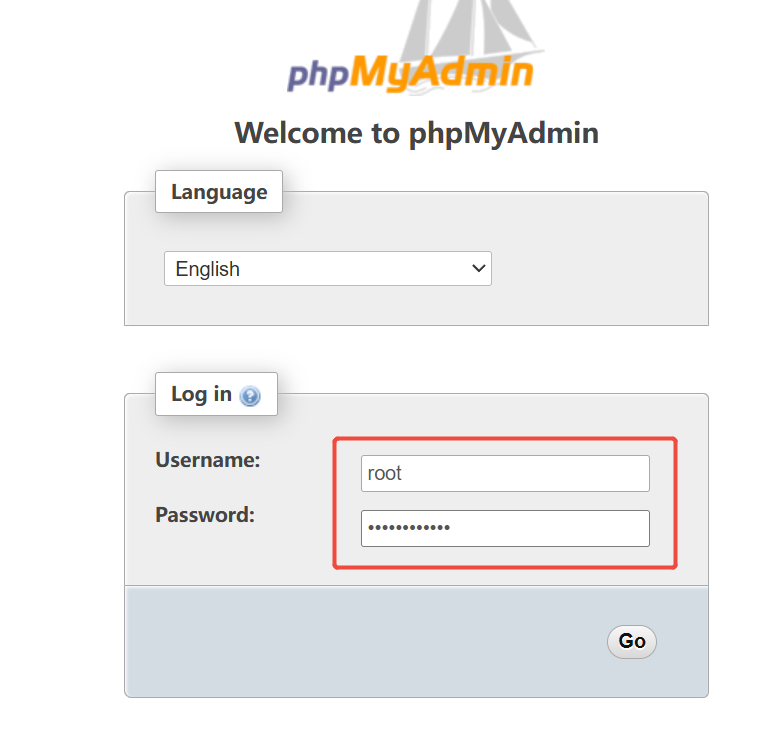
Enter the account and password you just set, then click on "Go"

Click on "SQL", and enter the following command(Grant superuser permissions to the root):
update mysql.user set Super_priv='Y' where User='root';
flush privileges;
Then click on "Go"

The image above indicates that the command was executed successfully. You can now exit and return to the console.


Follow the steps outlined in "一、Configurations on the Source Database Side (UCloud)" to configure the target database, setting up a NAT gateway and port forwarding so that the target database can be accessed over the internet via the public IP 152.32.181.231 and port 3306.
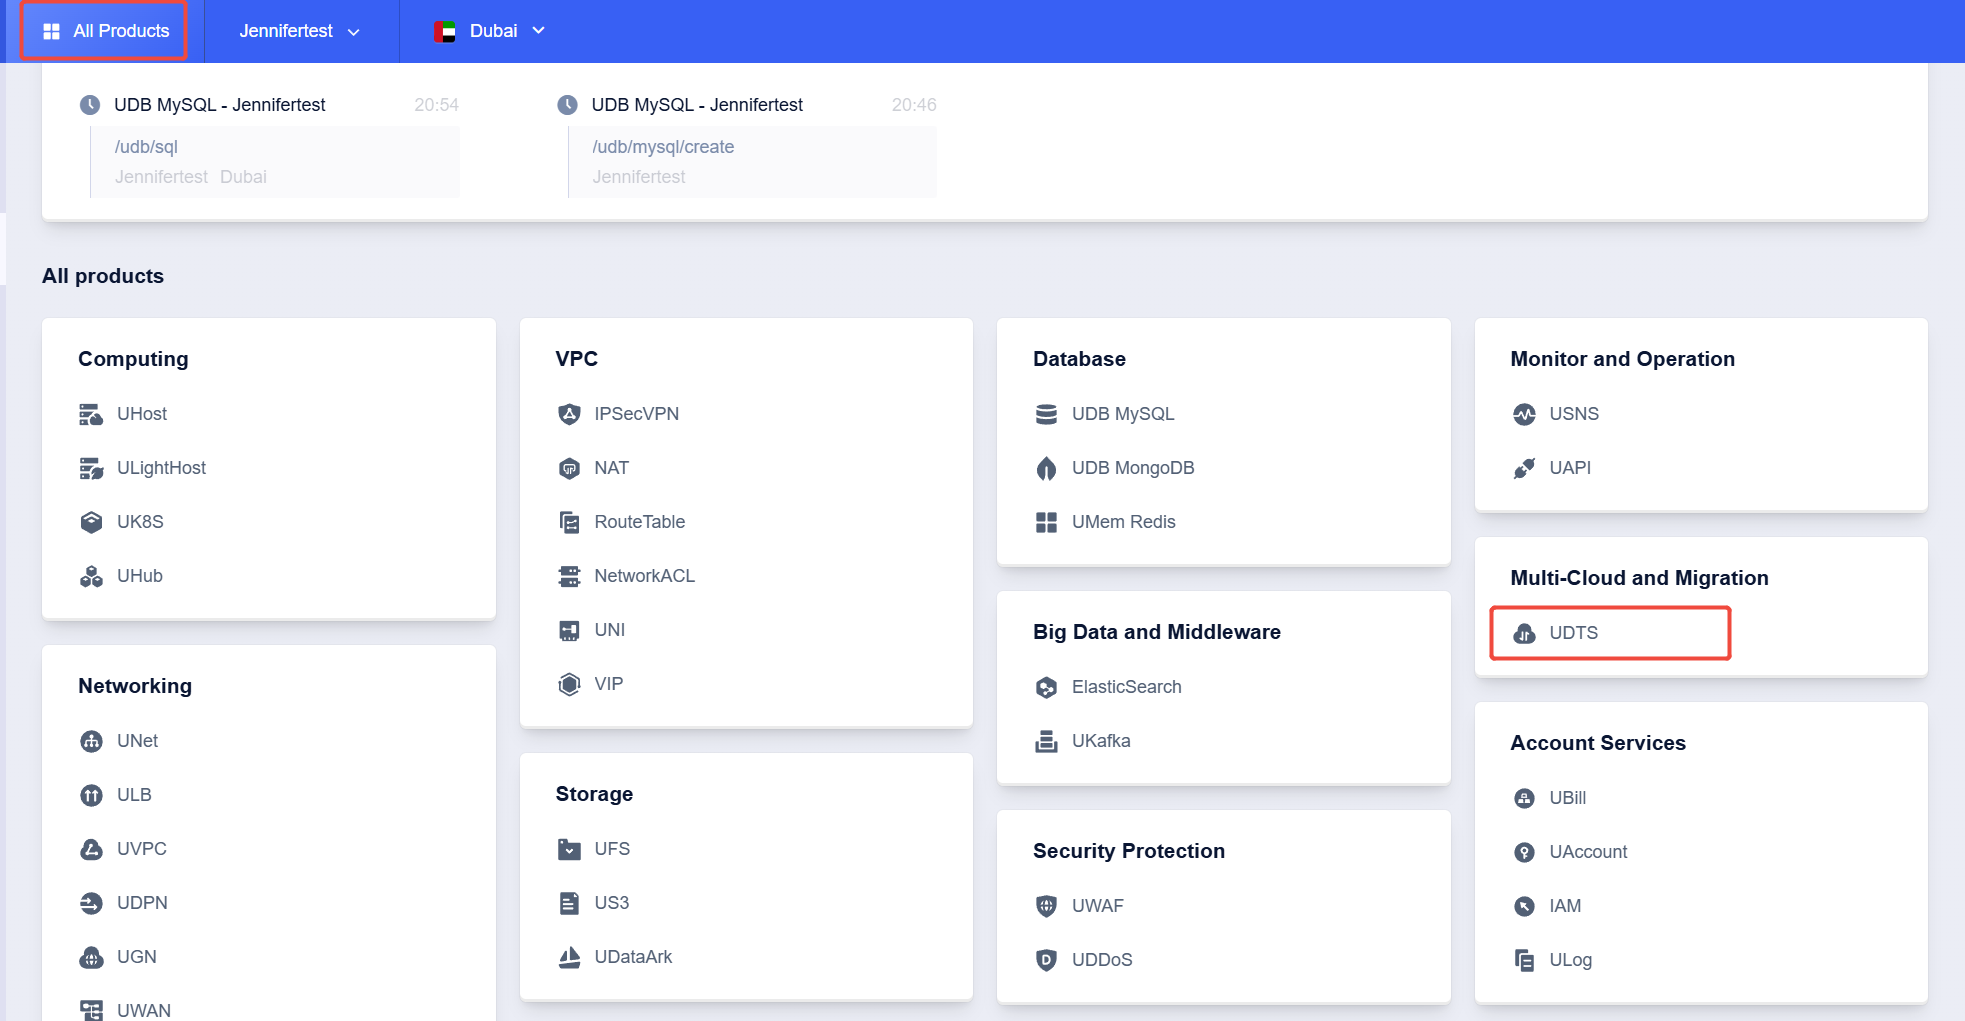
Click on "All Products", then click on "UDTS"

Click on "Create Task"
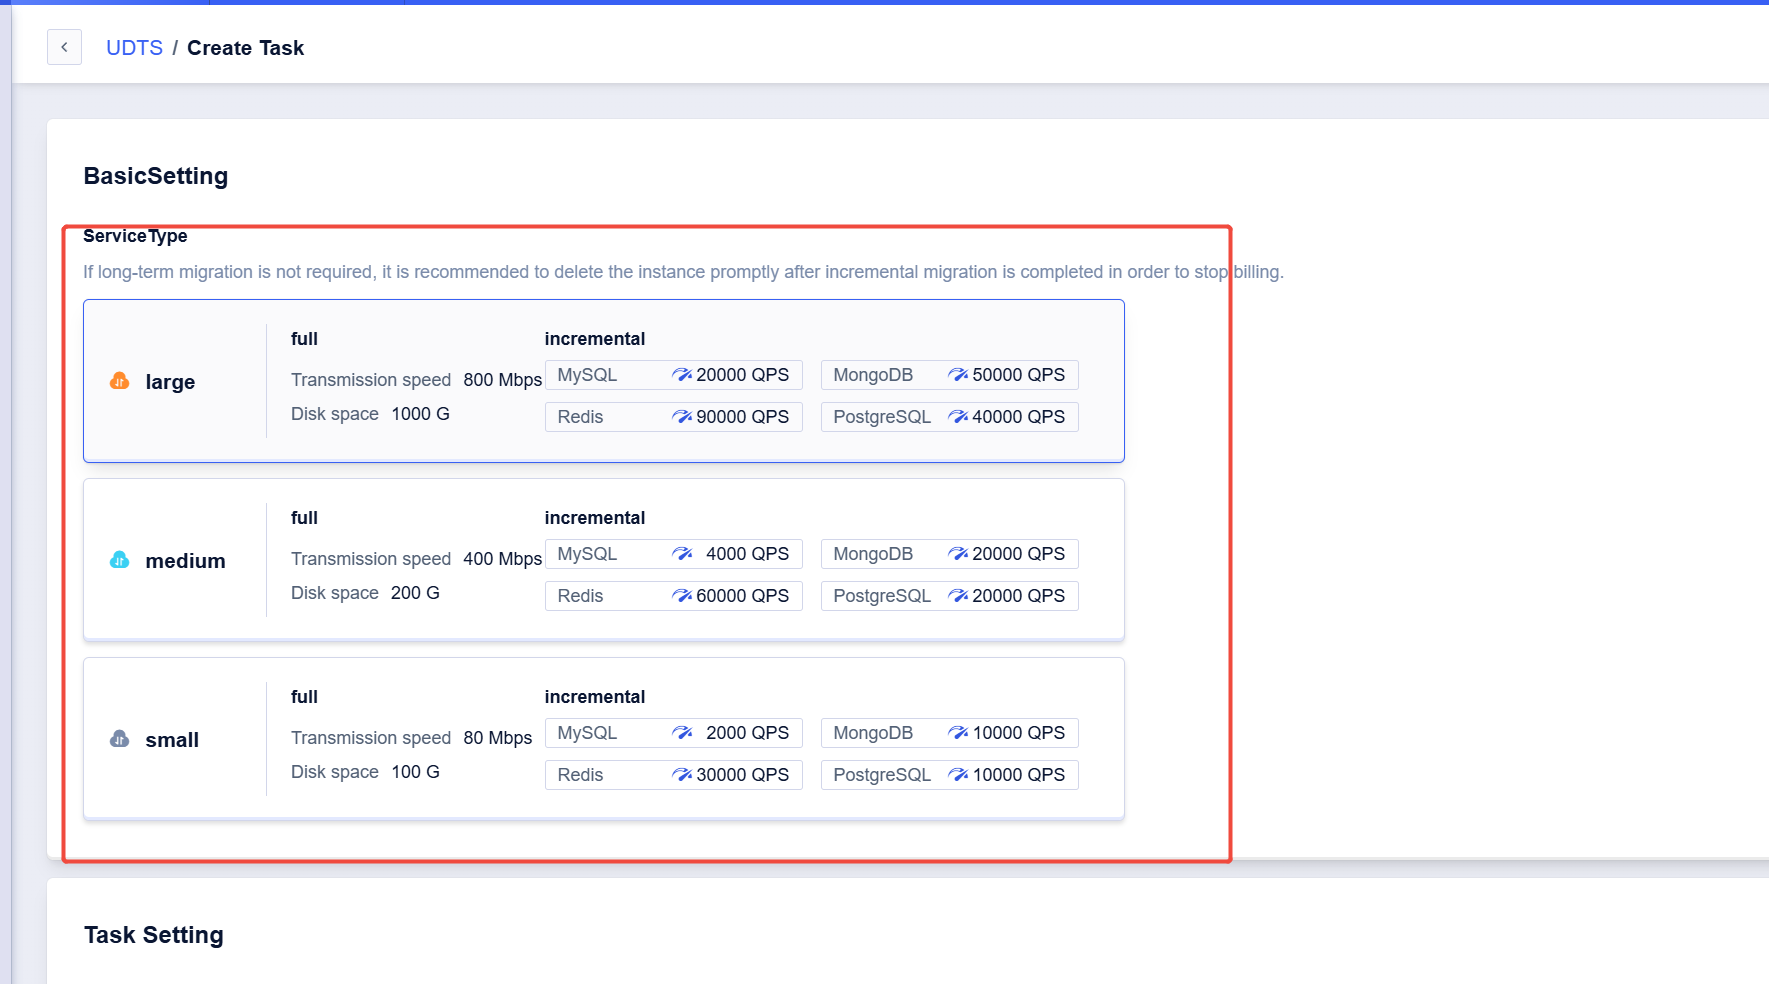
Select your desired Service Type
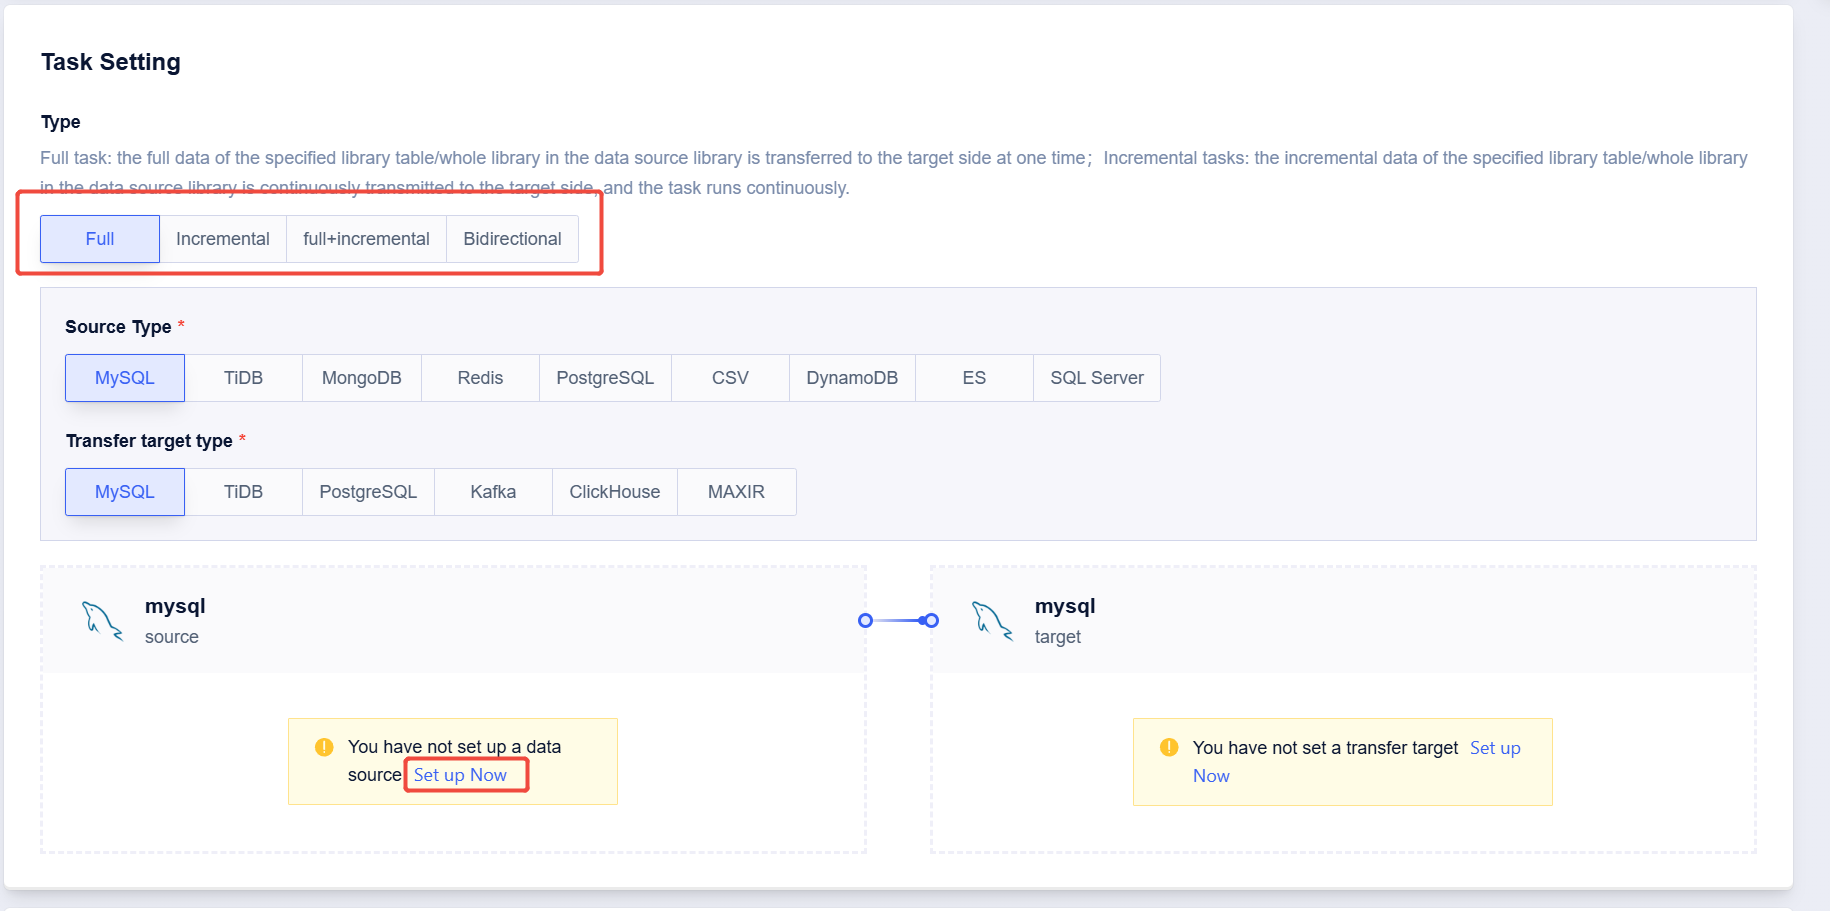
After selecting the migration type as needed, click on "Set up Now" for the source database.
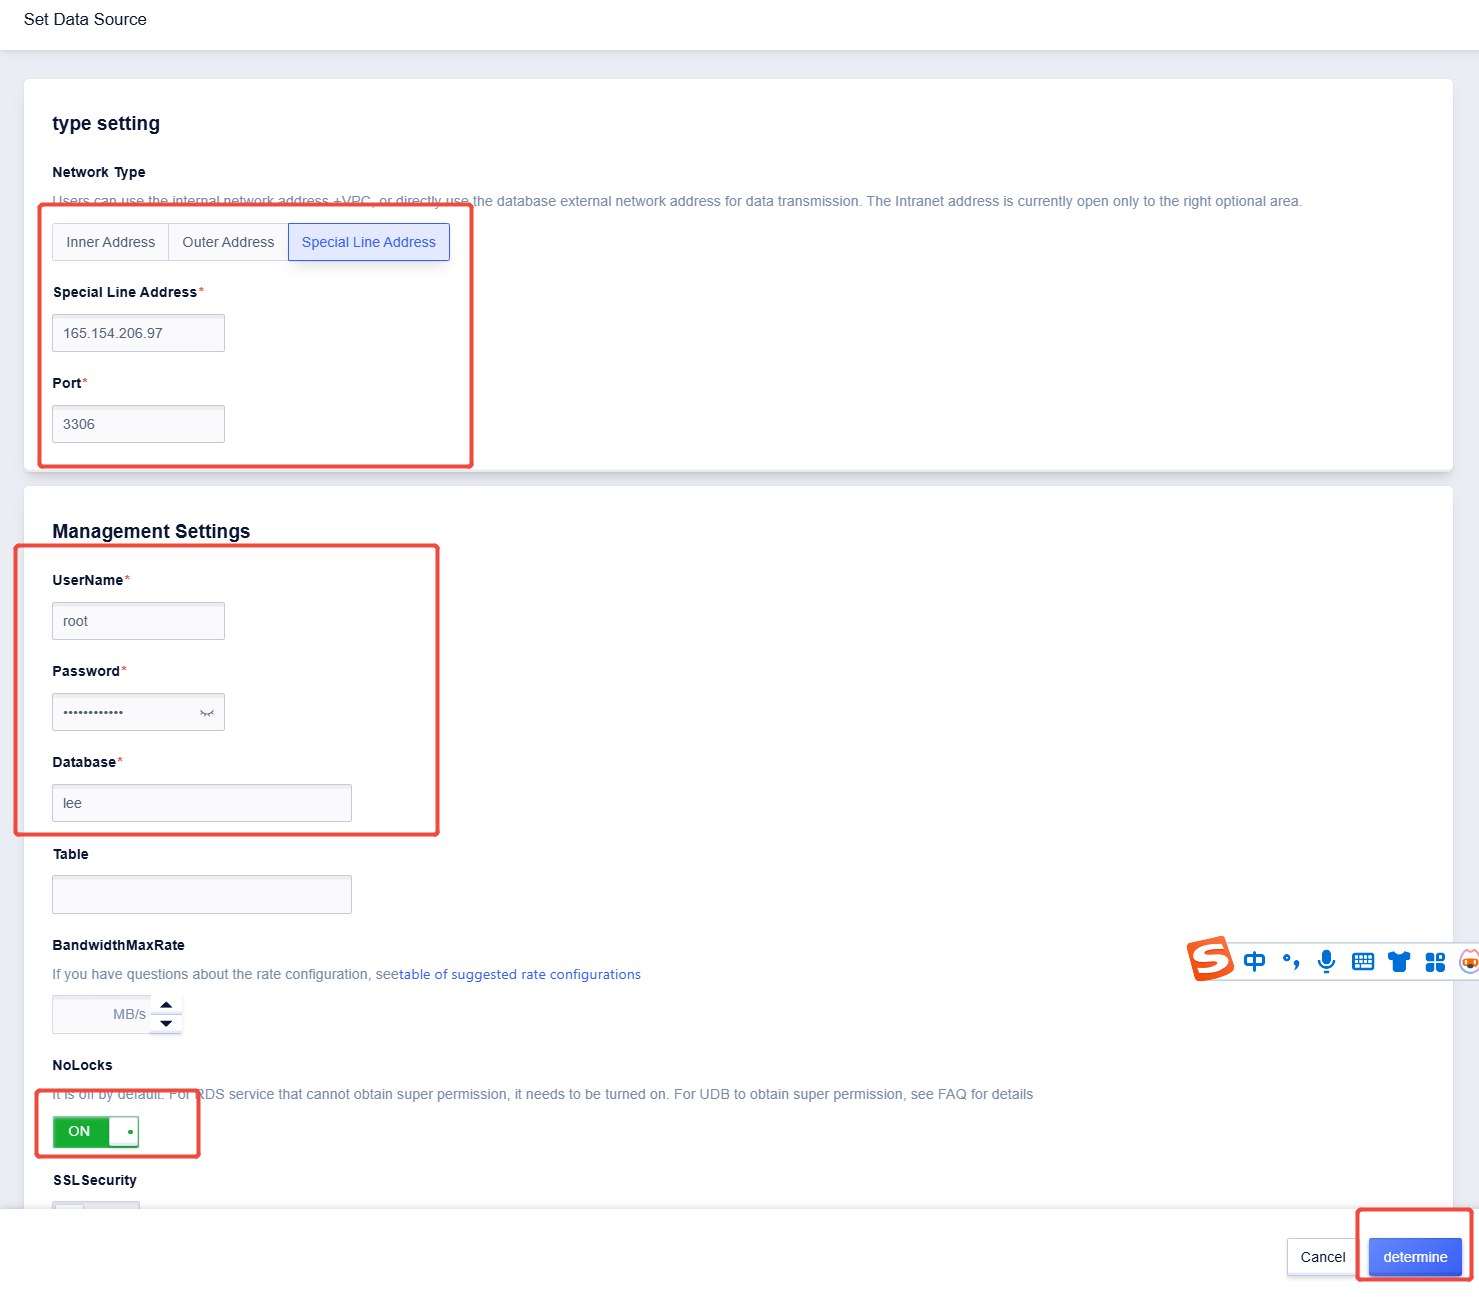
1、 Click on "Special Line Address", and enter the public IP and port 3306 of the source database's NAT gateway.
2、 Enter the MySQL database account and password for the source, along with the databases that need to be migrated (“*” represents all databases).
3、 Enable “NoLocks”
4、 Click on “determine”
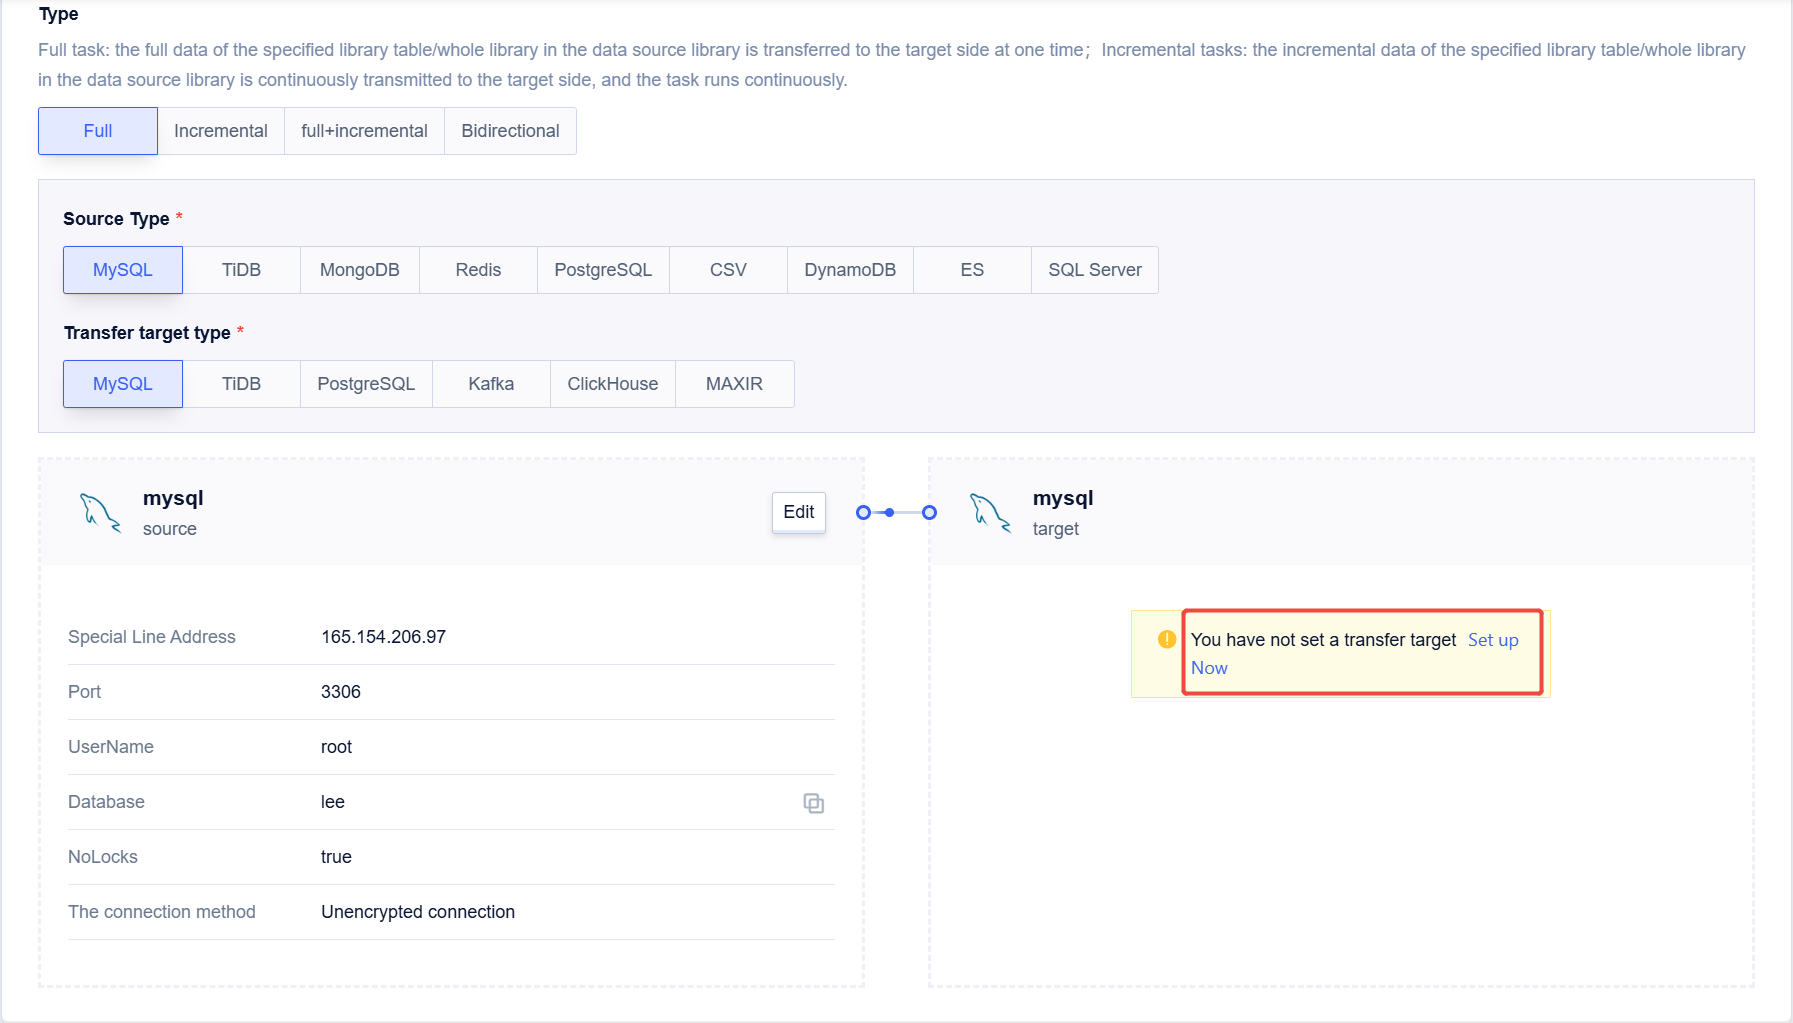
Click on "Set up Now" for the target database.
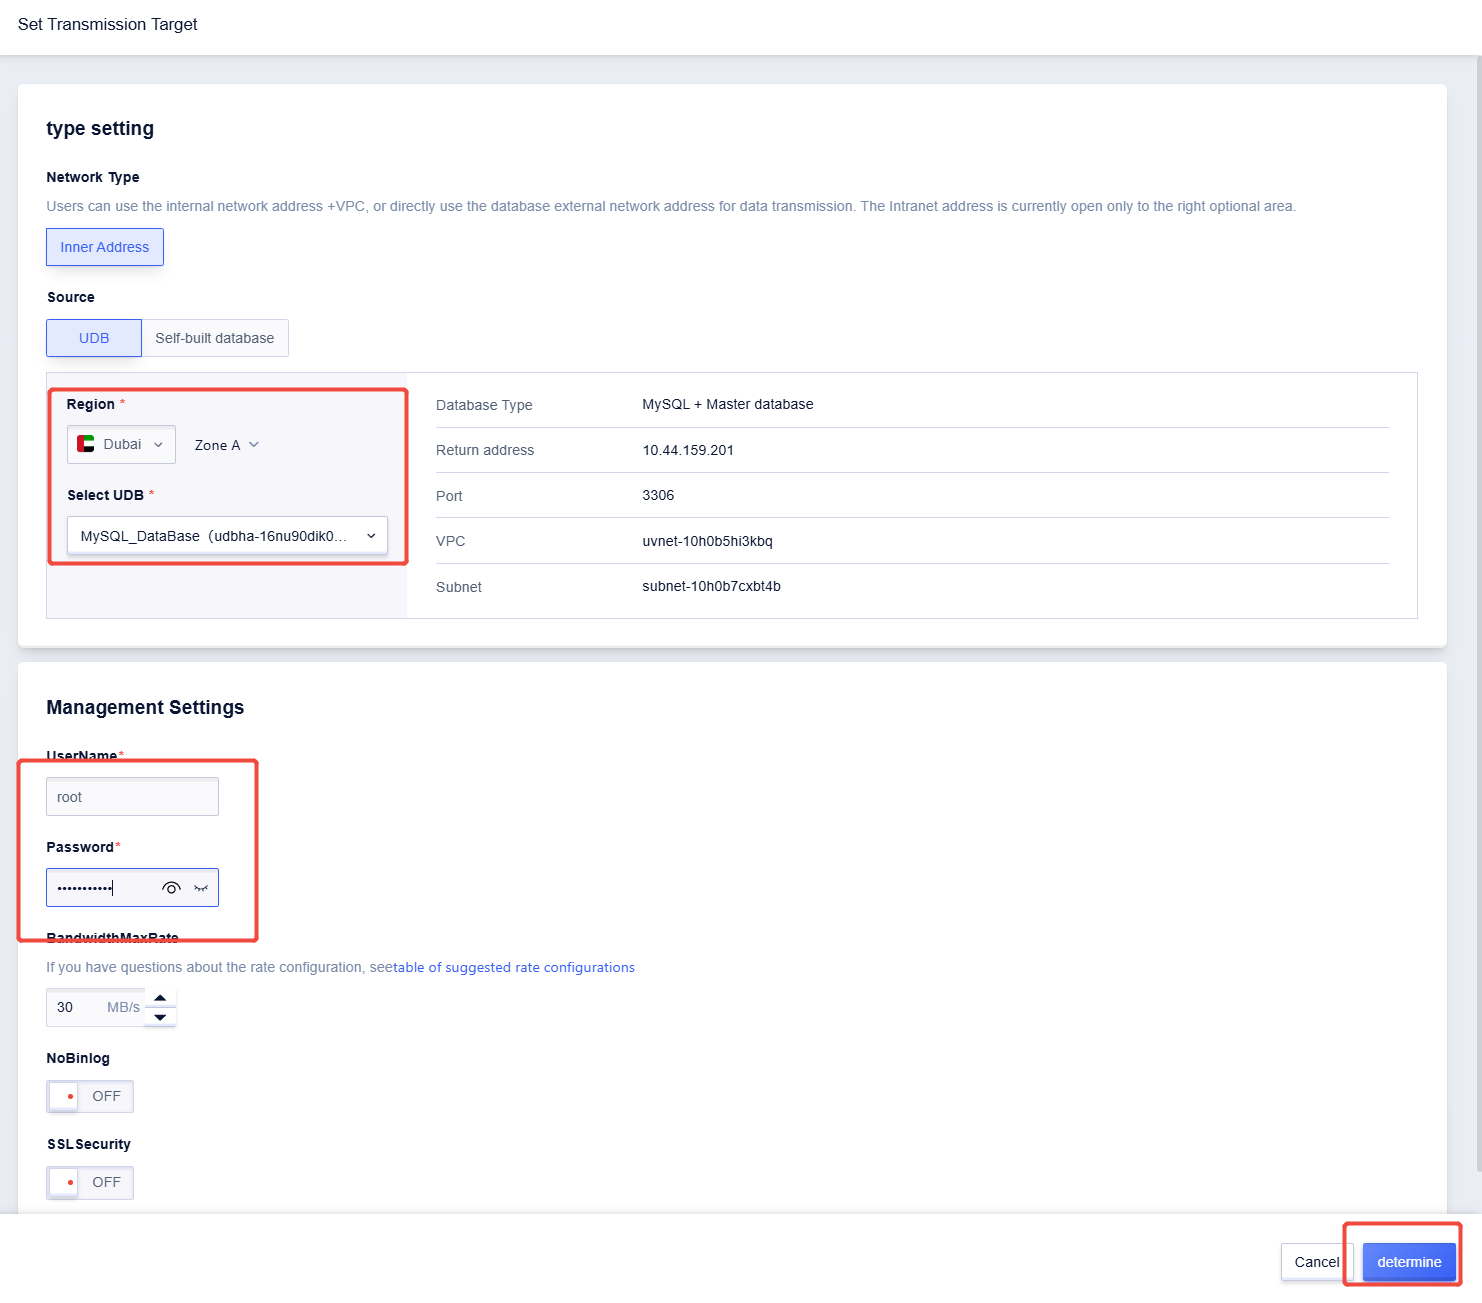
1、 Select the region where you created the target database and choose the target database.
2、 Enter the MySQL database username and password for the target database.
3、 Click on "Determine".
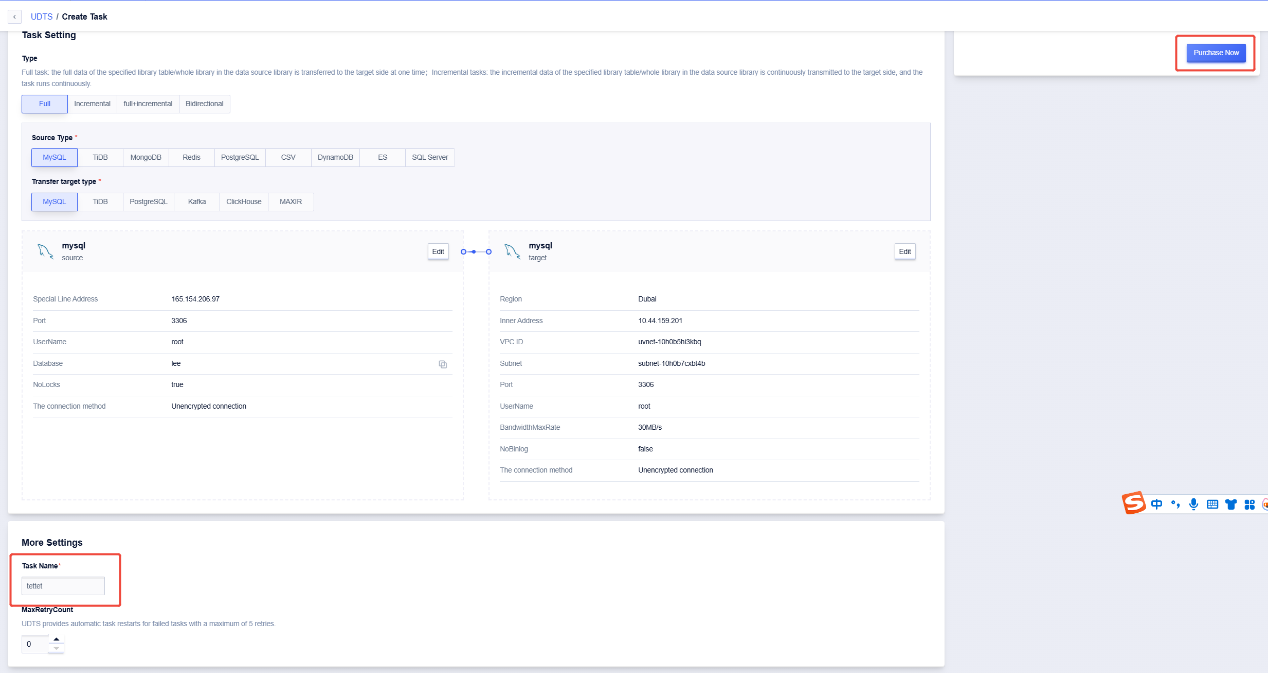
Set the Task Name, then click on "Purchase Now".
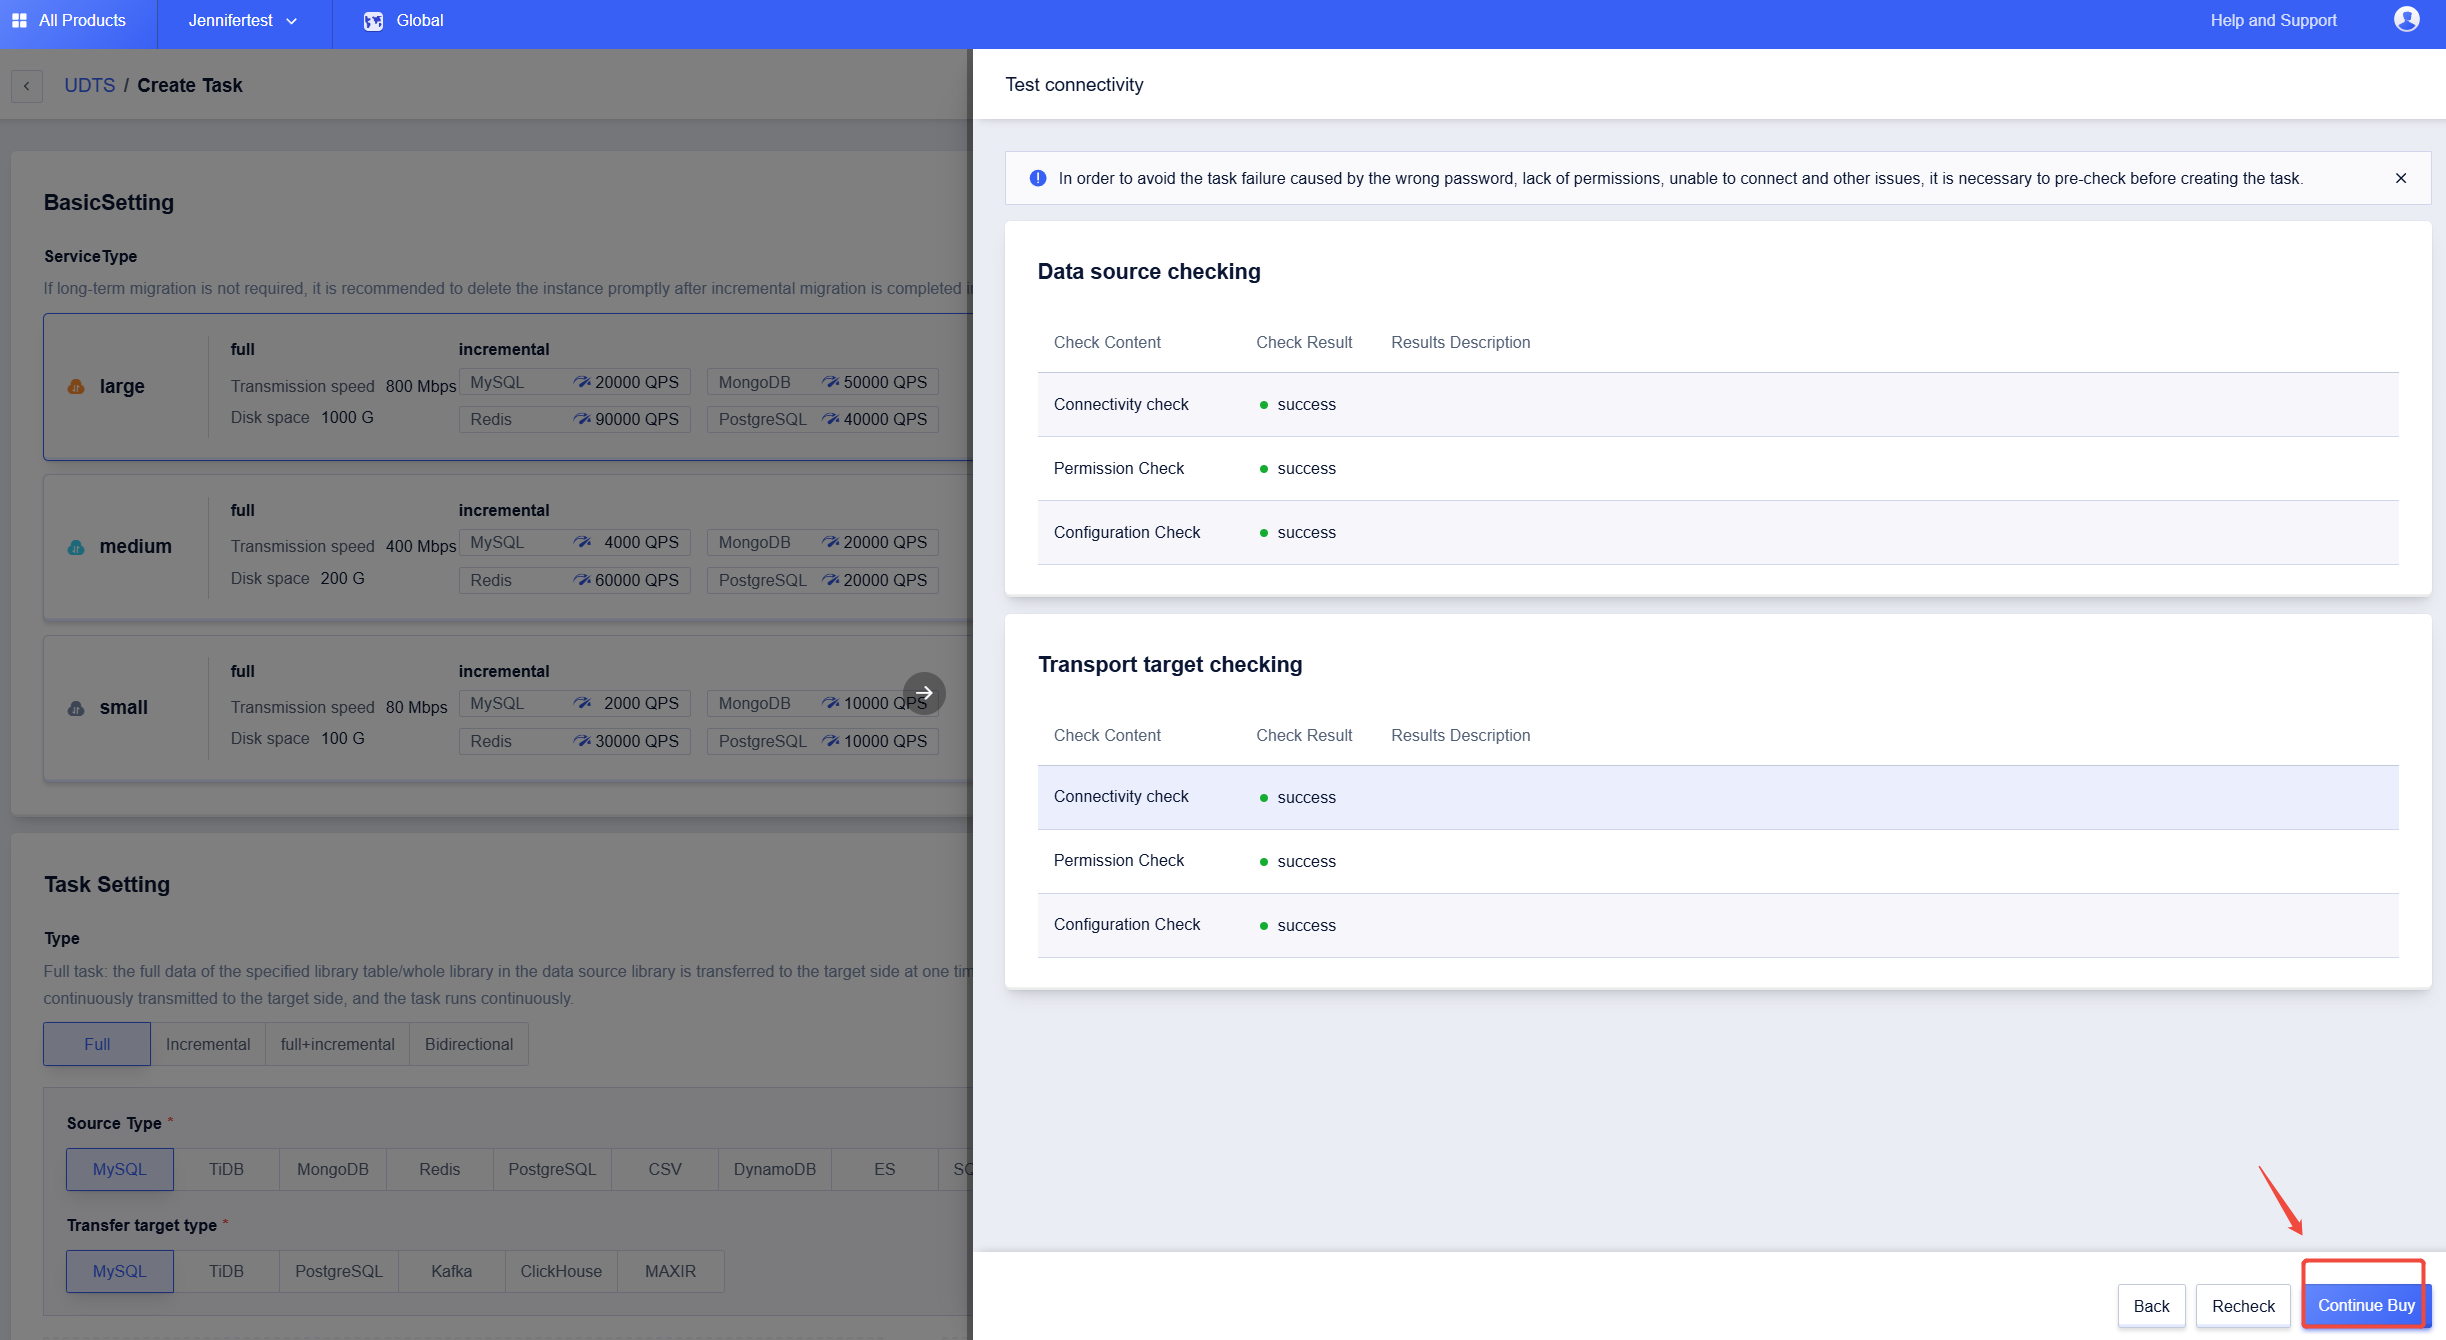
The image above shows that the Pre-check was successful. Click on "Continue Buy"


Click on "Start", then click on "OK".

The image above shows that the database migration (UDTS) was successful.


